
Solarisation is a broad-spectrum, chemical-free technique used to kill weeds, weed seeds and pathogens (fungi, bacteria, plant parasite nematodes, mites) utilising solar energy and clear plastic sheeting to trap heat in the upper soil layers. Studies have found several fungal pathogens have been almost completely eradicated using solarisation including Fusarium spp., Phytophthora spp., Pythium spp., Sclerotium spp.
- Advantages of soil solarisation: It is cheap, chemical-free and effective, and kills some pathogens, parasitic plant nematodes, weeds and seeds.
- Disadvantages of soil solarisation: It is only effective during long periods of sunshine, ineffective in shady areas, kills useful organisms in the soil, and the area must remain crop-free during treatment. It has been speculated that helpful, free-living earthworms are likely to survive solarisation by relocating to cooler areas. Helpful bacteria and fungi such as actinomycetes, Trichoderma, Talaromyces, and Aspergillus spp., can survive periods of increased temperatures up to 45°C (113°F) and mycorrhizal fungi rapidly recolonise. The disposal of plastic can be problematic. Solarisation may control rhizomes or bulbs close to the soil surface, but not those buried deeply.
The best time to do solarisation is summer when the days are long and temperatures are at their hottest July – August in the Northern Hemisphere and January – February in the Southern Hemisphere. Solarisation is best carried out on heavy, clay soil which retains water better than sandy soil.
What you will need
- Thick clear polyethylene or polyvinyl chloride 0.5 – 4 mm thick (do not use black plastic which is less effective at transferring heat to the soil beneath it). Thinner film conducts heat more effectively, however, it is more prone to ripping.
- Sharp scissors to cut the plastic into shape.
- Measuring tape to measure the area to be covered.
- Hose and nozzle or sprinkler system.
- Fork or spade.
- Rake.
- Bricks or planks of wood.
How to solarise soil
Pre-soil treatment preparation: Regularly watering the area to be treated can encourage weed growth, increasing the efficacy of soil solarisation.
Soil additives: The addition of animal manures prior to solarisation can help to increase the rate of decomposition and increase the heat-carrying capacity of the soil and protect soil microbial biomass and enzymatic activities.
Soil preparation: Turn the soil to break up large chunks, and remove rocks, stones, old roots, weeds, debris and anything else that may puncture the plastic. The soil should be level to allow the plastic sheet to sit as close as possible to the soil. Leave a shallow trench around the edges of the area to be treated.
Measure out the plastic: Carefully measure the area. Cut the plastic, leaving a wide enough margin to bury the edges of the plastic 15 cm (6 inches) into the soil which will prevent the wind from blowing the plastic up.
Water: Once the area is clear of debris and flat, water the area with a hose or sprinkler. Wet soil conducts heat better than sandy soil. The soil should be moistened to a depth of 15 cm (6 inches) for solarisation to be effective. If the soil is sandy, a drip irrigation can be placed on top of the soil prior to covering and used sporadically to re-moisten the area.
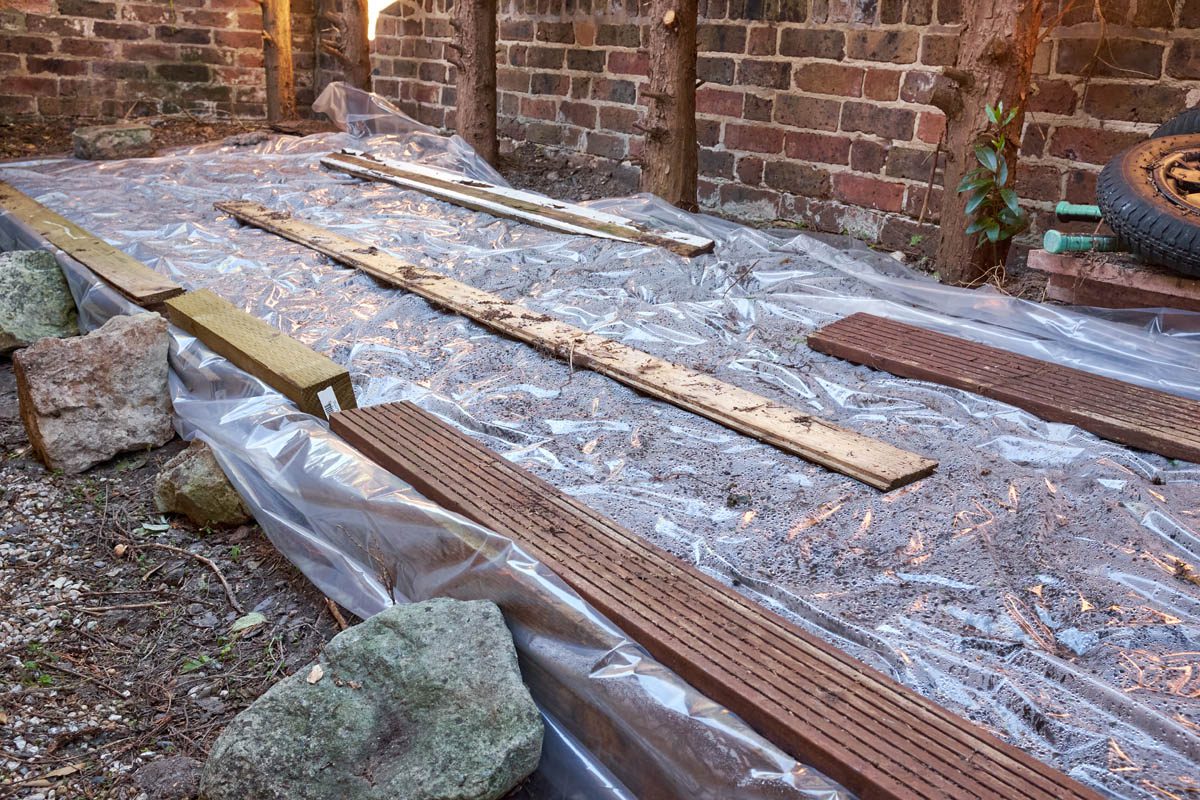
Cover: Place the plastic sheeting over the area, place the edges into the outer trenches, and cover in soil. Pull the plastic sheet tight, and ensure a complete seal, to avoid allowing heat to leak out of the sides, or air pockets.
Care: Do not walk on the area or allow animals to walk over it, to reduce the risk of damaging the plastic. If holes do develop, seal them with duct tape.
Duration of treatment
The plastic sheet should remain in place for at least 4 – 6 weeks to allow heat from the sun to penetrate through the soil. Do not plant anything during the treatment period. Soil temperatures can reach 35-60°C (95°F to 140°F) during treatment.
Once the sheet has been removed, planting can take place as soon as the soil temperature has returned to normal, which takes a few hours. Soil solarisation treats the top 10 – 15 cm (4 – 6 inches) of soil, soil any deeper remains untreated and is a potential vector of pathogens and weeds. Add seeds or new plants, digging no deeper than 5 cm (2 inches). A layer of compost to the top surface can help restore helpful microbes. The solarisation process will typically last 3 – 4 months before pathogens make their way up to the top soil layer, and weed seeds blown onto the area germinate. Adding a layer of mulch around plants will inhibit weed growth.
Conclusion
Solarisation is a cheap and effective way to treat weeds and soil-born pathogens, but as it is reliant on extended periods of clear, hot weather, it may not always be successful. A shower or two won’t greatly impact solarisation treatment, however, extended periods of rain will.
Julia is a writer and landscape consultant from Wollongong with a love of horticulture. She had been an avid gardener for over 30 years, collects rare variegated plants and is a home orchardist. Julia is passionate about learning and sharing her knowledge of plant propagation and plant toxicology. Whether it’s giving advice on landscape projects or sharing tips on growing, Julia enjoys helping people make their gardens flourish.

")

