
What is root rot? Ι Causes of root rot Ι Signs of root rot Ι How to inspect the roots for signs of root rot Ι How to save a plant with root rot Ι How to prevent root rot in plants
What is root rot?
Root rot is a condition characterised by the decay and death of plant roots with two primary causes; not enough oxygen (anoxia or hypoxia) or bacterial, viral, fungal and water mould infection. Because root rot occurs beneath the soil, a considerable amount of damage can occur before it is noticed.
Causes of root rot
Low or no oxygen (anoxia and hypoxia) in the soil:
Plant roots require oxygen, which they obtain through pores in the soil. Anoxic or hypoxic conditions occur when the soil is constantly wet, resulting in compaction. When the soil compacts, pores (air pockets) in the soil, collapse and the roots are starved of oxygen.
Root rot affects houseplants that have been overwatered as well as outdoor plants and agricultural crops, especially during periods of prolonged rain. Incorrect soil type also plays a role, for example, most succulents need well-draining soil and are more prone to rot in regular potting mix. Pots without drainage holes exacerbate the problem as water has nowhere to escape.
Related: Can you grow variegated Monstera from seed?
Infectious root rot:
Fungal and oomycete species are the most common pathogens responsible for root rot in agricultural crops¹. Some root rot pathogens are host-specific, but others have a wide range of plant species they can infect. Soil pathogens such as nematodes and fungus gnats can damage stems and roots, facilitating the entry of root rot pathogens.
Bacterial root rot is most commonly caused by Erwinia species. Fungal root rot is caused by Fusarium, Bipolaris, Alternaria, Gaemonnomyces, Cercosporella, Typhula, Rhizoctonia and Aureobasidium species². Water moulds include Pythium and Phytophthora species. Since it is usual for multiple pathogens to be present, root rot is referred to as a “root rot complex.”
Bacteria, fungi and water moulds are everywhere, many of which are beneficial to plants and live in a symbiotic relationship. However, pathogenic bacteria, fungi and water moulds can become dominant strains under the right conditions. Wet soil and humidity provide the perfect environment for these pathogens to multiply.
Signs of root rot
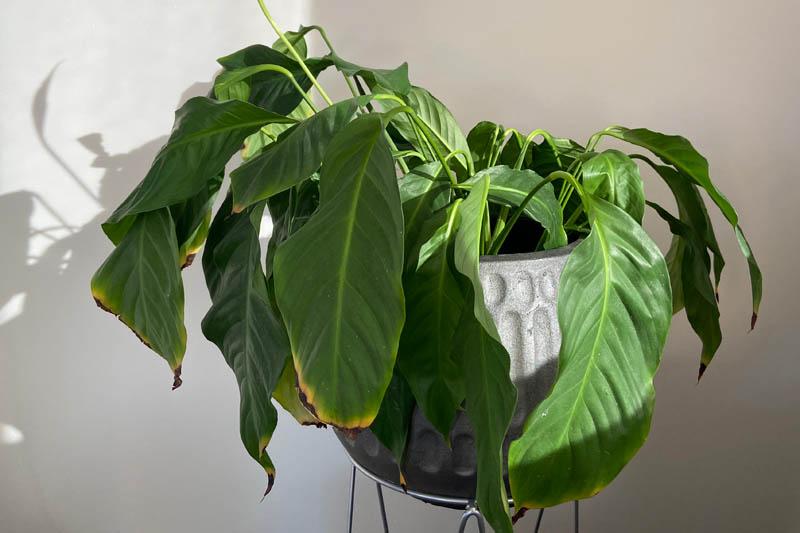
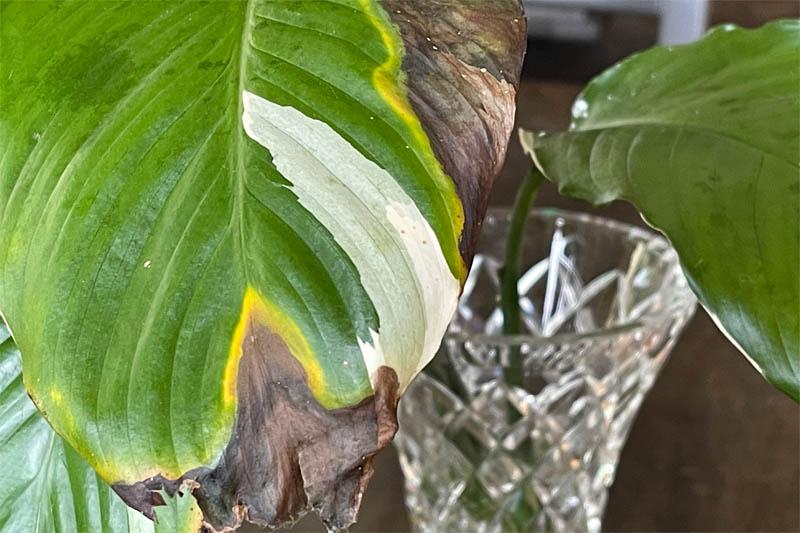
Symptoms of root rot from overwatering are similar to the signs of overwatering which can mislead growers into watering the plant even more.
- Wilting leaves
- Sunken chlorotic (yellow) leaves
- Crown rot
- Brown lesions on the leaves
- Leaf drop
- Rat tail roots (the outer cortex sloughs off the roots, leaving a strand of vascular tissue)
- Stunted growth
- Dieback
- Plant death
- Unpleasant swamp like odour from the roots
How to inspect the roots for signs of root rot
The only way to diagnose root rot is to inspect the roots of the plant. It is important to take care to avoid accidental damage.
Carefully pick up the pot and place the flat of your hand over the soil. Place the index finger and thumb on one side of the stem, and the remaining fingers on the other. Turn the pot upside down and tap the base to dislodge the plant.
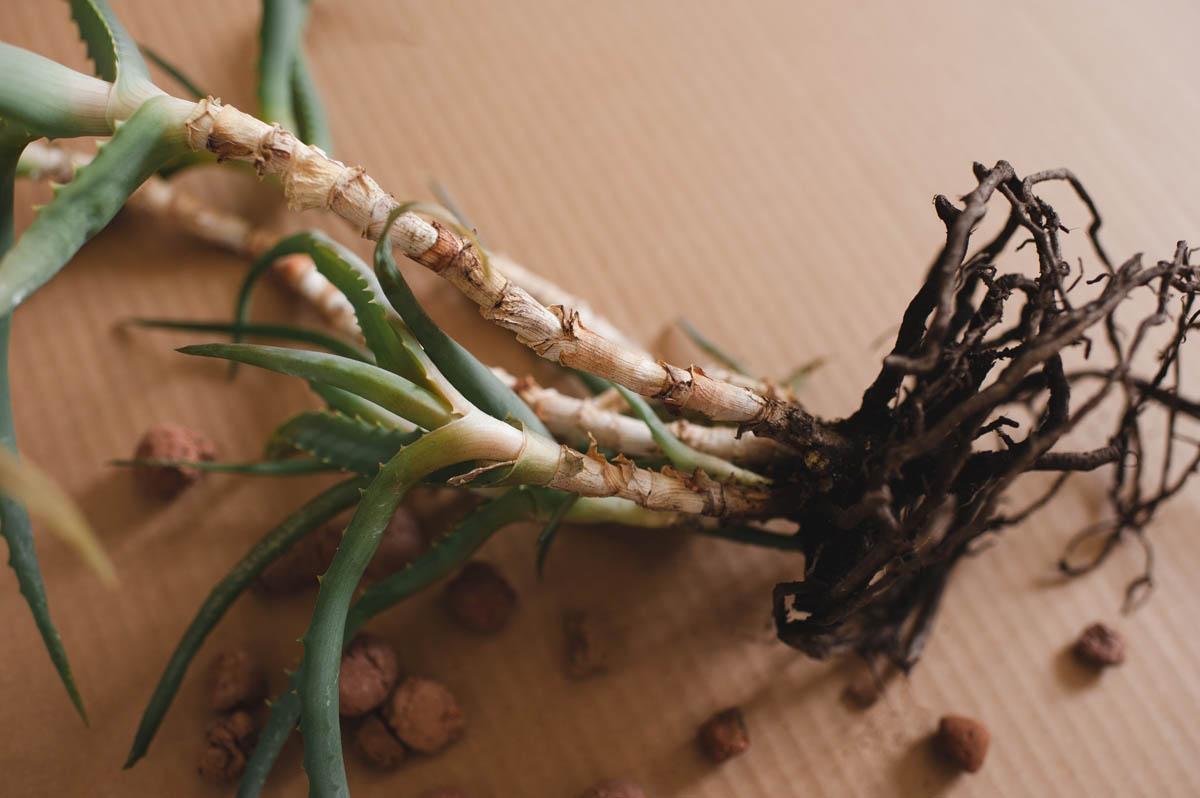
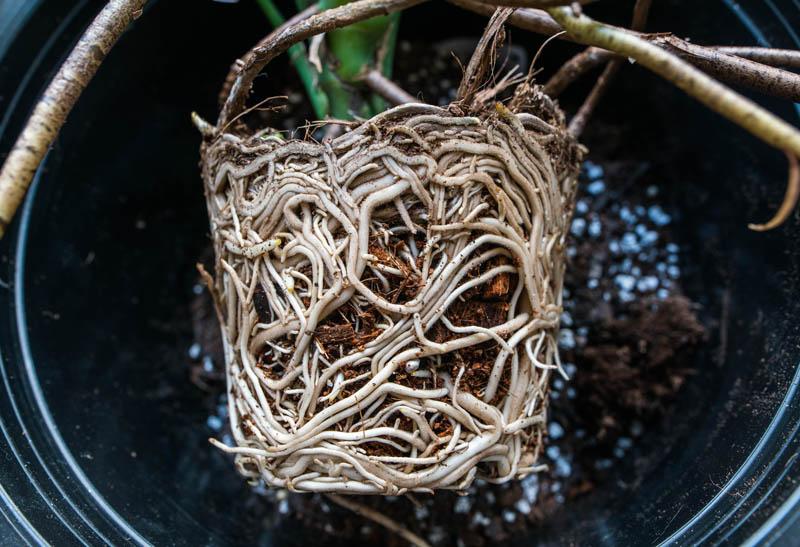
Healthy roots are creamy-white with a yellow tip and firm to the touch, as you can see in the image below. Roots with root rot appear grey/black and are mushy.
How to save a plant with root rot
Equipment:
- Disposable gloves
- Hand sanitiser
- Sterilised scissors
- 3% hydrogen peroxide or unscented bleach
- Clear plastic pot (with plenty of holes)
- Sterile potting medium, or a clear glass that is large enough to fit the plant
- Air stone and pump (optional)
Method:
- Take the plant out of the pot: Remove the plant from the pot and discard the potting medium and the pot. If you do want to re-use the pot, scrub it with warm soapy water to remove all organic matter and rinse well. Soak the pot in a bleach solution to kill pathogens.
- Clean the roots: Carefully tease apart the roots and wash as much soil as you can from the roots using warm tap water.
- Sterilise: Sanitise your hands, and if possible, put on a pair of clean disposable gloves.
- Treat the roots: Cut away any rotted or black roots with sterile scissors. Remove the disposable gloves, sterilise your hands again, and apply a clean pair of disposable gloves.
- Root soak: Combine a solution of 80% water and 20% hydrogen peroxide, or 10% unscented bleach and 90% lukewarm tap water, and leave the roots and stem to soak for two hours. This should kill off any remaining pathogens on the roots. Hydrogen peroxide is better than bleach, and bleach should only be used as a last resort. If using bleach, make sure the roots are free of all debris and organic matter which deactivate bleach³.
- Set up the new pot: While the plant is soaking, take a new pot and fill it with fresh potting media. I recommend clear ‘orchid’ pots so that I can keep an eye on root development. Select a pot that is only slightly larger than the root ball as overpotting is a major cause of root rot. There are a number of options depending on the plant’s preferences including potting mix, orchid mix cocoperlite, leca or a combination of these mixes. The latter two are hydroponic mediums and therefore the plant will need to be regularly fed. Improve drainage and aeration by adding perlite and or leca to the potting mix (I use one part potting mix, 1 part leca and 1 part perlite for my aroids). Alternatively, you may wish to keep the treated plant in water for a few weeks to monitor the roots and change the water every 2-3 days. The addition of an air pump and stone will help oxygenate the water.
How to prevent root rot
Don’t overwater:
Get to know the water requirements of each houseplant and water as needed, not per schedule. Every plant has unique water needs. Don’t assume a wilting plant needs water. If you notice a plant wilting, stick your finger into the top 5 cm (2 inches) to check that it is dry, if it is, water the plant.
Select the right potting mix:
Always select the correct potting medium for your plant. Some plants like to be in moist soil, while others prefer to remain on the drier side. Your local garden centre will be able to advise on the most suitable potting medium for each plant. Or, you can modify potting mix by adding leca, perlite, or sand for extra drainage.
Proper drainage:
Choose pots with plenty of drainage holes for excess water to escape. If there are not enough, you can add some to plastic pots by carefully heating the tip of a knife and twisting it into the pot to make more holes. Pots designed for indoor use often don’t have a drainage hole or the hole contains a silicone plug. These types of pots hold in moisture which means the plant is sitting in saturated soil. If you do use decorative pots with poor drainage, place the plant in a plastic pot with good drainage inside the decorative pot. It can help to take the plastic pot out of the decorative pot, water the plant in the sink, and wait for 5 minutes until the water has stopped draining out of the bottom. Place the plastic pot back in the decorative pot. Saucers placed underneath the plant and cork mats will prevent water from seeping out and damaging furniture.
Purchase a water meter:
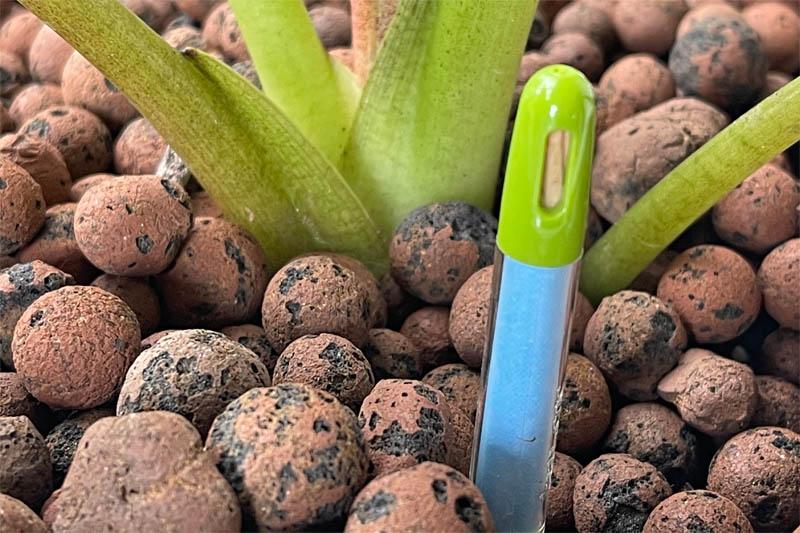
As a chronic over-waterer, I now use Sustee Aquameters. These moisture sensors tell me when the pot is moist or dry by changing colour. Due to a fruit fly infestation, I have covered the top layer of potting mix with leca. This helped eliminate the fungus gnats but made it difficult to gauge moisture levels. Blue indicates the soil is moist, and white indicates it is dry. As these stay in the soil, there is less chance of root damage compared to the more common moisture sensor which you dip into and out of the soil.
Check new plants:
Any new plant arrival should be removed from its pot and inspected for signs of root rot.
Sanitation:
Regularly clean and sterilise garden equipment. Do not reuse potting medium, and keep hose heads or the end of hoses off the ground.
Go easy on the fertiliser:
Avoid over-fertilising as excess nitrogen levels as excess levels can suppress natural plant defences against disease⁴.
Can plants with root rot be saved?
Unfortunately, root rot is not reversible. Gardeners may be able to stop its progress if there are still viable roots, but not all plants can be saved. It may be possible to take stem cuttings, from healthy tissue.
REFERENCES:
- Bruce A. Williamson-Benavides 1 and Amit Dhingra: Understanding Root Rot Disease in Agricultural Crops
- Diagnosis of soil fungi that cause root rot
- World Health Organization. (2014): Use of disinfectants: alcohol and bleach
-
UK Research and Innovation: Understanding the impact of soil nitrogen on plant disease resistance
Julia is a writer and landscape consultant from Wollongong with a love of horticulture. She had been an avid gardener for over 30 years, collects rare variegated plants and is a home orchardist. Julia is passionate about learning and sharing her knowledge of plant propagation and plant toxicology. Whether it’s giving advice on landscape projects or sharing tips on growing, Julia enjoys helping people make their gardens flourish.


