Soil pH is the acidity or alkalinity of soil which plays an important role in plant health. The pH scale ranges from 0 to 14. 7 is neutral pH, values below 7 indicate the soil is acidic, while values above 7 indicate that the soil is alkaline. Soil pH impacts the availability of nutrient uptake and the activity of soil microorganisms.
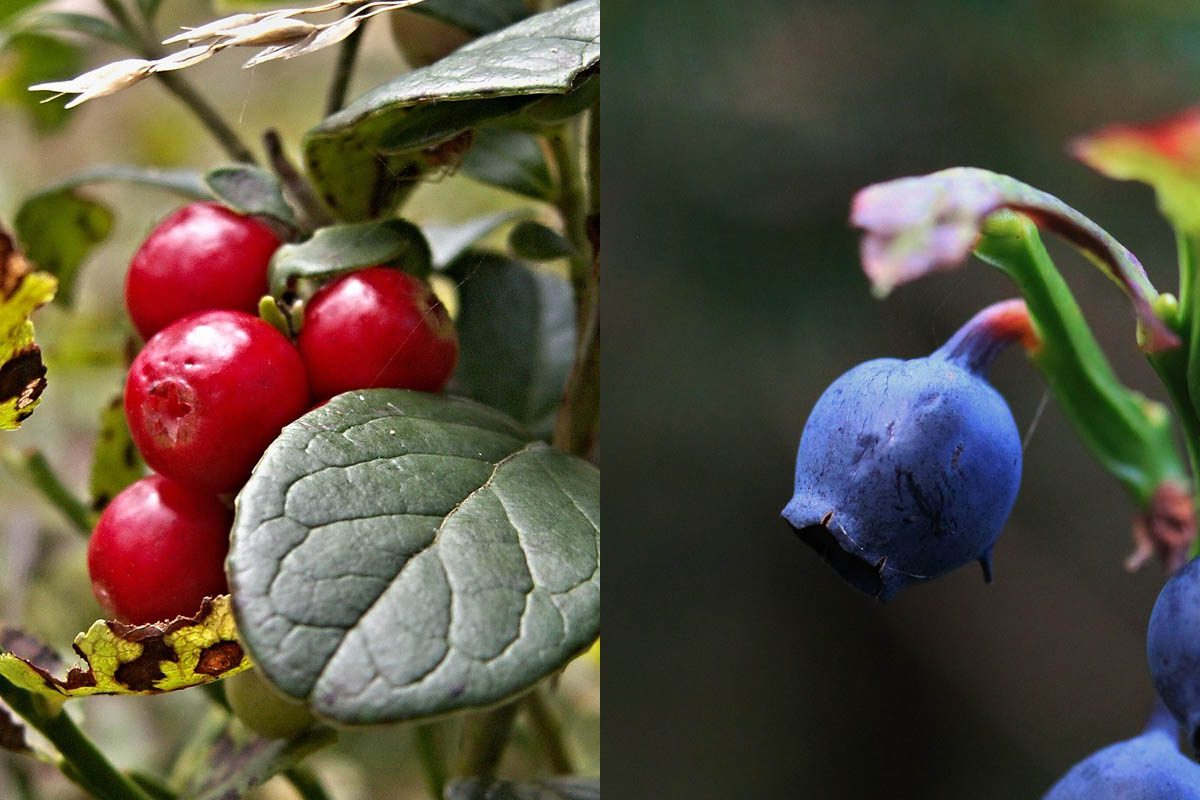
Low (acidic) pH soil has a high hydrogen ion concentration and high (alkaline) pH values have a low hydrogen ion concentration. Most plants prefer a neutral to slightly acidic pH range of 6.0 to 7.5. However, some plants have very specific preferences. For example, blueberries thrive in acidic soil of pH 4.5 to 5.5), while asparagus prefers alkaline soil of pH 7.0 to 8.0.
Various factors influence soil pH including rainfall, the type of minerals and organic matter present in the soil. Areas with high rainfall generally have more acidic pH as rainwater can leach away basic elements such as calcium and magnesium. Arid regions are typically more alkaline.
What does pH mean?
The term “pH” stands for “potential of hydrogen” or “power of hydrogen.”It measures the concentration of hydrogen ions (H⁺) in a solution. The pH scale is logarithmic, which means that each whole pH value below 7 is ten times more acidic than the next higher value. For example, a pH of 4 is ten times more acidic than a pH of 5 and 100 times more acidic than a pH of 6. Similarly, each pH value above 7 is ten times more alkaline than the next lower value.
7.0—neutral
> 7.5—alkaline
< 6.5—acidic (soil with pH less than 5.5 is strongly acidic)
How do hydrogen ions form in water?
Oxygen and hydrogen are atoms, which can bond together to form a molecule. A water molecules are made up of two hydrogen atoms and one oxygen atom (H₂O) that are bonded together.
When a water molecule (H₂O) donates a proton, H⁺ (a hydrogen atom without its electron) to another water molecule, it becomes a hydronium ion (H₃O⁺). The receiving water molecule, which accepts the proton, then becomes a hydroxide ion (OH⁻). This happens during the self-ionisation of water.
This occurs due to the constant collisions between molecules in a liquid or gaseous state. This type of interaction is common in many chemical reactions.
Factors that determine soil pH
Most soils have a pH range between 3.5 and 10. There are several factors that influence the pH of soil:
Parent material: The original rock material that formed the soil, called parent material, influences the initial pH of the soil. Rocks such as limestone create more alkaline soil, while granite can lead to more acidic soil.
Rainfall: Areas with high rainfall generally have more acidic soils. This occurs because water can leach basic ions, such as calcium and magnesium, out of the soil, leaving behind more acidic ions like aluminium and iron.
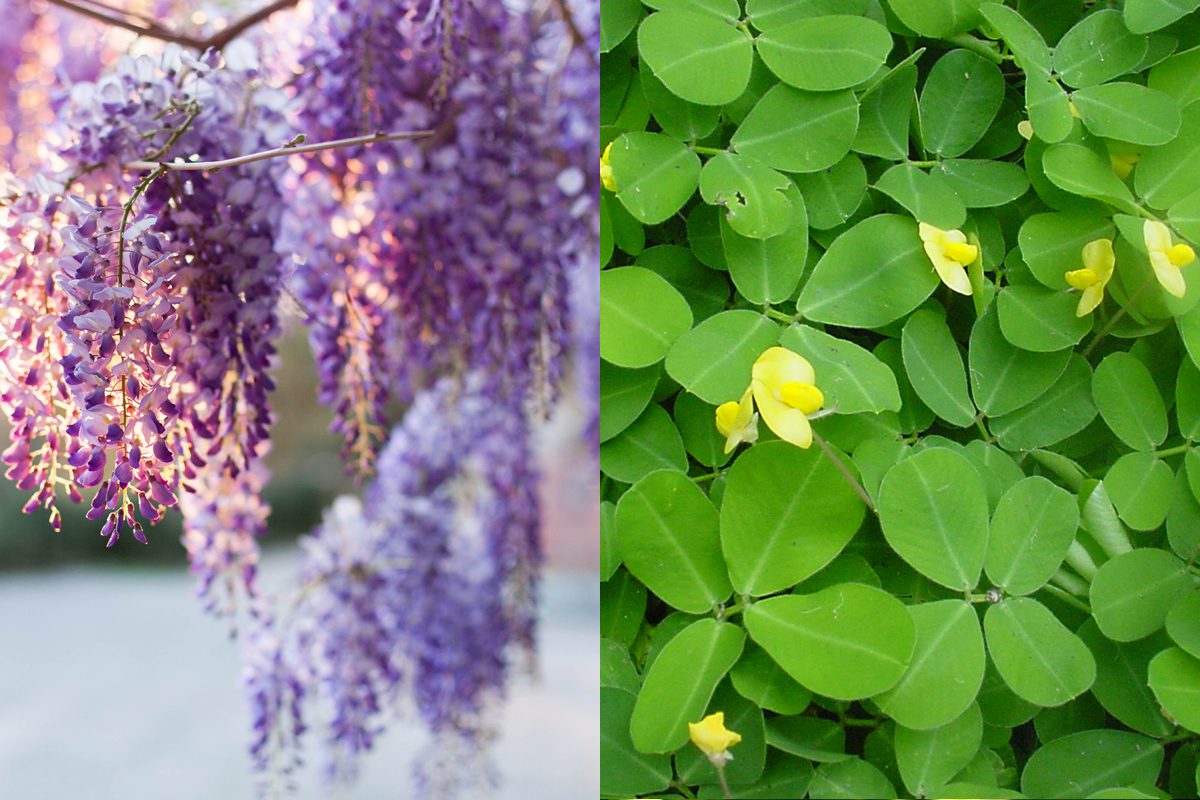
Plant and microbe activity: Certain plants and soil microbes can alter the soil pH. For example, legumes work with bacteria to fix nitrogen, which, in turn, makes the soil more alkaline. When plant material decomposes, organic acids can be produced, making the soil more acidic.
Human activity: Fertilisers, lime, or sulfur, can significantly change soil pH. For example, applying lime (calcium carbonate) raises soil pH, making it more alkaline, while adding sulfur can lower the pH, making the soil more acidic.
Soil pH levels play a significant role in a plant’s health and growth. When soil pH is too high or low, it can affect the availability of nutrients essential for plant growth.
Acidic soil:
Low (acidic) pH soil (high hydrogen ions) impacts the availability of phosphorous, calcium and magnesium.
Phosphorous (P) can react with aluminium and iron in highly acidic soil to form iron phosphate and aluminium phosphate, both of which are insoluble, and therefore unavailable to plants.
Calcium(Ca) and magnesium carry a positive charge (cations). In highly acidic soil, high levels of hydrogen ions that carry a positive charge are present. Hydrogen ions can outcompete calcium and magnesium for binding sites on negatively charged soil particles. This results in less calcium and magnesium available for plant uptake. High acidity can also increase calcium and magnesium leaching, further reducing their availability in the soil. Once displaced from the soil particles, calcium and magnesium ions become part of the soil solution. When rainfall or irrigation exceeds the soil’s ability to hold water, this excess water drains through the soil, carrying with it soluble nutrients, including the displaced calcium and magnesium.
Aluminium (Al) is abundant in the earth’s crust and is normally locked up in minerals such as feldspars and clays. When soil pH drops below 5, these aluminium-containing minerals begin to dissolve, releasing aluminium ions (Al3+) into the soil solution which can be taken up by plant roots. High concentrations of Al3+ can damage root tips and limit the ability of the roots to take up water and nutrients.
Manganese (Mn) is an essential micronutrient for plants but can be toxic in excess when present in excess. Under acidic conditions, the Mn2+ ion becomes highly available and can be taken up in large amounts by plant roots. This can lead to an accumulation of manganese in the plant tissues, interfering with the plant’s metabolic processes, particularly photosynthesis.
Alkaline soil:
In alkaline (low hydrogen ions) soil iron, manganese, boron, copper, and zinc become less soluble. On the other hand, nutrients like calcium and magnesium can become more available.
Iron (Fe) and manganese (Mn) can oxidise (combine with oxygen), to form iron (III) oxide and manganese (IV) oxide. These compounds are less soluble and hence less available to plants as they form a type of rust in the soil, which the roots are unable to absorb.
Phosphorus (P) can combine with calcium (Ca) to form calcium phosphate, a compound that is not easily dissolved in water and thus not readily available for plants to absorb.
Iron (Fe), copper (Cu), and zinc (Zn) can form insoluble chelates (a compound that contains a ligand bonded to a central metal atom), that are not available to most plants.
When the soil pH is too high (alkaline), these enzymes produced by beneficial bacteria, fungi and other microbes may not function effectively, reducing the microbes’ ability to metabolise nutrients and reproduce.
Sodium (Na), lead (Pb), copper (Cu), cadmium (Cd), nickel (Ni) and zinc (Zn) are more soluble and thus more bioavailable at high pH levels. This can be harmful to acidophilic microbes, nitrogen-fixing bacteria as well as other soil-dwelling bacteria, fungi, and archaea.
How to test soil pH
Testing soil pH is important to ensure plants are grown under optimal conditions to ensure they thrive. The good news is that pH testing is easy and cheap, starting from $10.00 for a pH meter.
pH meter:
pH meters are readily available at garden centres for a few dollars. They consist of two metal prongs that are inserted into the soil, an internal electric reference electrode and circuitry, a battery compartment and a display screen.
pH meters with metal prongs measure the voltage potential between the prongs when they are inserted into the soil. This is created due to the difference in hydrogen ion concentrations between the soil and a reference electrode inside the meter. The meter converts this voltage difference into a pH reading based on the relationship between voltage and pH.
How to use:
pH meters are simple to use. Just insert the prongs into the soil and the needle will show you the pH of the soil. When you are finished, wipe any soil debris from the prongs and rinse in distilled water. Distilled water has a neutral pH of 7, which means it won’t interfere with the pH reading of the next sample.
Vinegar and baking soda test:
The vinegar and baking soda test is a rudimentary and qualitative method to get a rough idea of whether the soil is acidic, alkaline, or neutral. This test is not precise and should not be relied upon for accurate pH measurements.
Alkalinity: White vinegar can test the alkalinity of a soil sample. Pour a small amount of white vinegar onto a sample of soil. If it starts to fizz or bubble, the soil is alkaline, with a pH above 7.
Baking soda: Take a moist soil sample and place it in a small container. Sprinkle a small amount of baking soda onto the soil. If it fizzes or bubbles, it indicates that the soil is acidic, with a pH below 7.
If neither tests produce any fizzing or bubbling, the soil has a pH of around 7.
pH paper:
A soil sample is collected from multiple spots and a soil: water suspension is made with distilled water to create a slurry. The most common ratio is 1:5 (soil:water). The mixture is allowed to settle, which takes between 30-60 minutes. Once this has occurred, the soil will have settled, leaving a layer of coloured (supernatant) water at the top. A pH paper strip is dipped into the supernatant and then removed. The soaked pH strip will change colour based on the acidity or alkalinity of the soil solution. This is compared to a colour chart provided to determine the pH.
Professional testing services:
A professional soil testing service can provide the most accurate result. The most common method is the 1:5 (soil:water) suspension method. This method involves creating a soil-water mixture, allowing it to settle, and then measuring the pH of the water. Here’s a step-by-step description of the process:
A small amount of soil is collected from multiple spots within an area to get a representative sample. This soil is then mixed with distilled water in a ratio of 1:5 (soil:water). So, for every part of soil, you add five parts of water. The sample is mixed thoroughly. After mixing, the soil-water suspension is allowed to settle for a specific period. This could be anywhere from half an hour to several hours, depending on the specific protocol being followed. After the soil settles, a pH meter is used to measure the pH of the water. The electrode of the pH meter is inserted into the supernatant (the clear liquid above the settled soil), and the pH reading is taken.
Correcting pH balances
Soil pH can be adjusted to suit the requirements of specific plants. Adding lime to the soil can raise its pH (make it more alkaline) while adding sulfur or peat moss can lower soil pH. Commercially available products are also available to help adjust soil pH. Gardeners and farmers need to test and, if necessary, adjust the pH of their soil to ensure that it is suitable for the plants they are growing, as it can significantly affect plant health and yield.
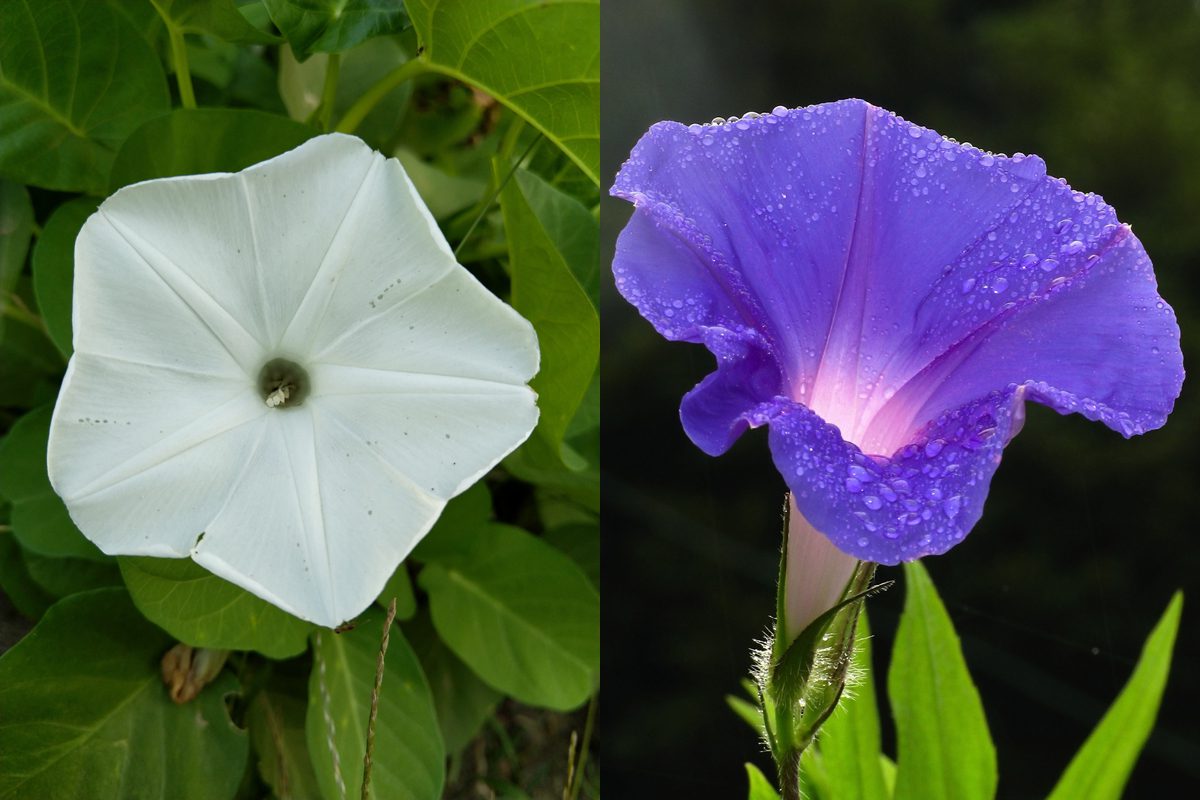
Effects of soil pH on flower colour
Most gardeners have heard about the effects of soil pH on hydrangeas. Acidic soil below 6 pH produces blue flowers and alkaline pH produces pink. Aluminium ions (Al3+) are easily absorbed by the plant roots and are transported through the vascular system too various parts of the plant, including the petals.
Anthocyanins are a type of water-soluble pigment present in the vacuoles of flowers, fruits and vegetables. Vacuoles are membrane-bound organelles located in plant cells that serve various functions, including storage of pigments and other compounds. Anthocyanins are responsible for the wide range of colours we see in the plant kingdom.
Hydrangea petals contain an anthocyanin known as delphinidin (Dp). Delphinin is a purple-coloured plant pigment belonging to the cyanidin-based anthocyanins. Not only is delphinin responsible for the purple hue in a range fo plants (including hydrangea), it is also an antioxidant.
Delphinidins are pH-sensitive. In acidic environments, the vacuoles of petal cells decrease, stabilising the molecular structure of delphinidin, and resulting in the characteristic blue colour. This process is known as ‘metal ion-induced colouration‘.
In alkaline soil, there is a decrease in the availability of aluminium ions and an increase in calcium and magnesium ions. These ions compete with aluminium ions for binding sites within the plant, reducing the uptake of aluminium by the roots. The resulting reduction or absence of aluminium ions leads to a chemical modification of the anthocyanin molecules, resulting in the formation of pink or red petals.
Hydrangeas flowers may be the most well-known plants impacted by soil pH, but other plants are also affected, including azaleas, rhododendrons, blueberries, lilacs and clematis.
Julia is a writer and landscape consultant from Wollongong with a love of horticulture. She had been an avid gardener for over 30 years, collects rare variegated plants and is a home orchardist. Julia is passionate about learning and sharing her knowledge of plant propagation and plant toxicology. Whether it’s giving advice on landscape projects or sharing tips on growing, Julia enjoys helping people make their gardens flourish.
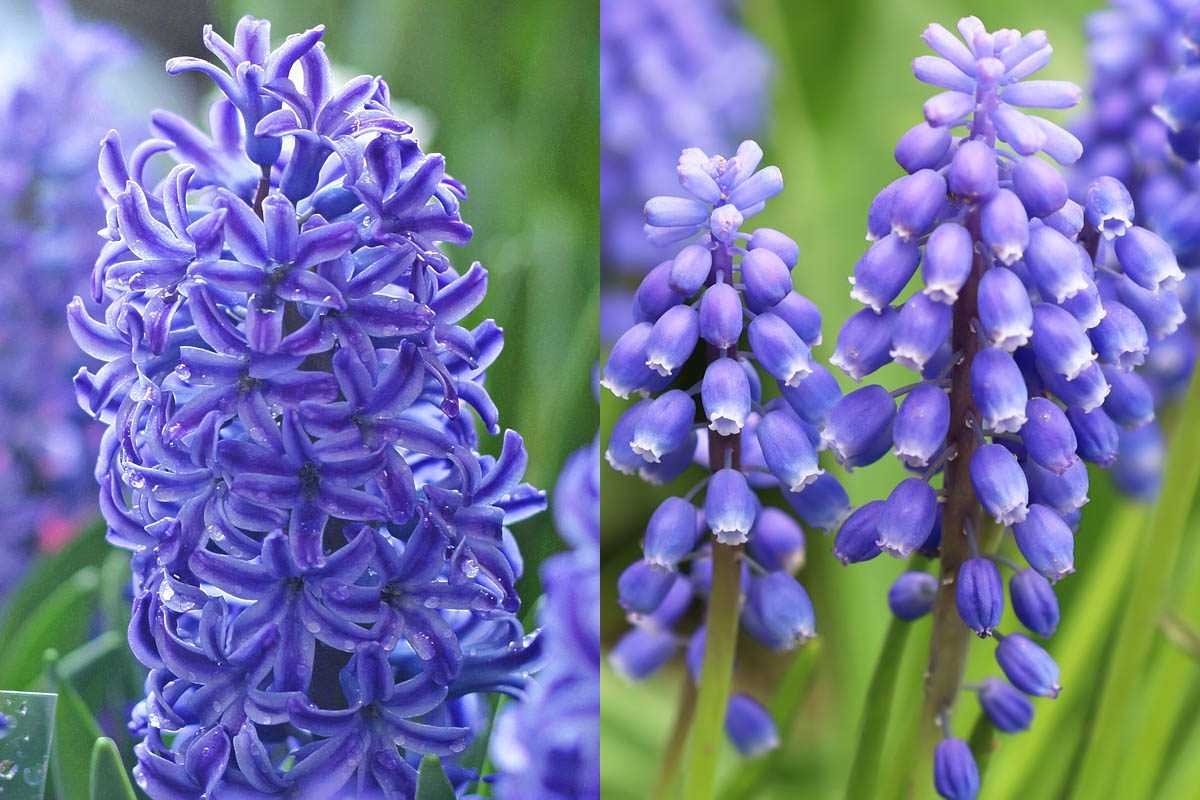
Hyacinth and grape hyacinth are two distinct species of flowering bulbs that belong to the Asparagaceae family. Hyacinths (Hyacinthus) and grape hyacinths (Muscari) are related, but they belong to different genera within the family Asparagaceae. Despite their similar names and appearance, they are distinct species.
Julia is a writer and landscape consultant from Wollongong with a love of horticulture. She had been an avid gardener for over 30 years, collects rare variegated plants and is a home orchardist. Julia is passionate about learning and sharing her knowledge of plant propagation and plant toxicology. Whether it’s giving advice on landscape projects or sharing tips on growing, Julia enjoys helping people make their gardens flourish.
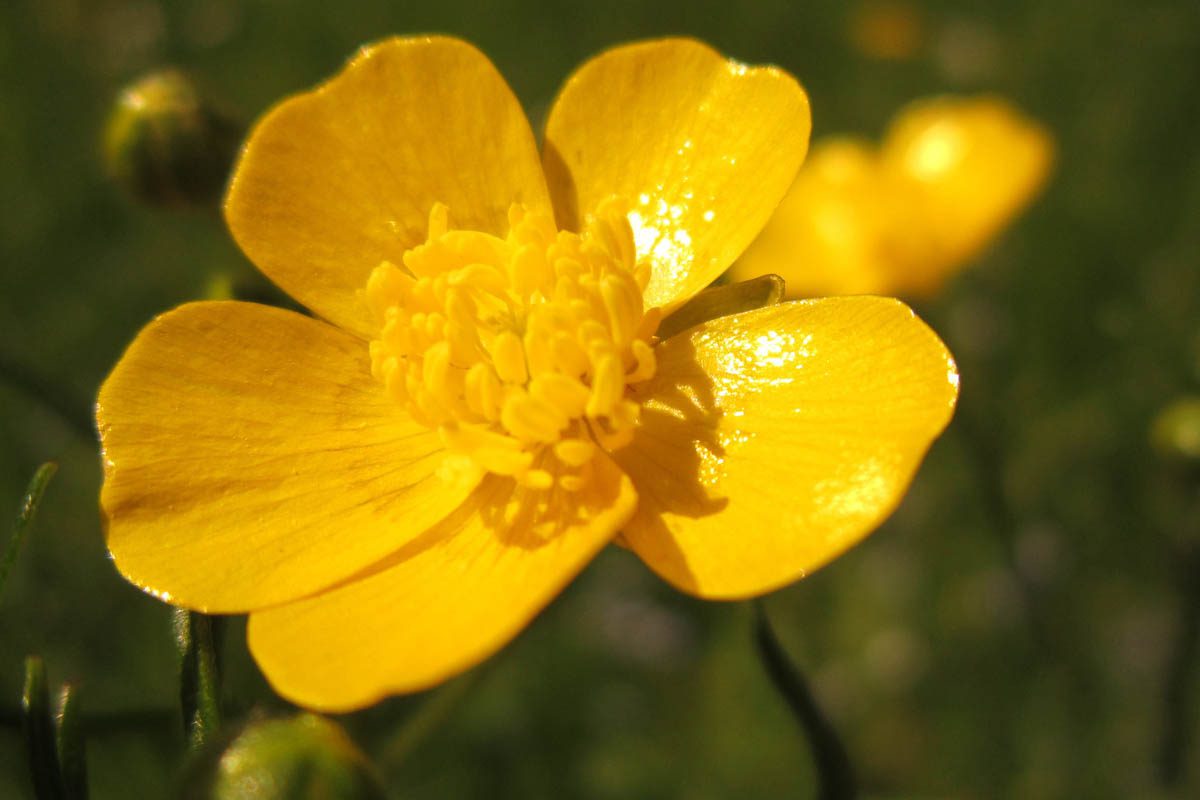
A favourite childhood game is to hold a buttercup (Ranunculus repens) under the chin, and if it glows yellow, you’re said to like butter. I remember playing this game with classmates in the sports field behind our primary school in England.
“Do you like butter? Hold this buttercup under your chin; If your chin turns yellow, Then you do!”
Behind this simple reflection of yellow light lies a fascinating botanical secret. The buttercup’s petals have evolved to reflect light in a specific way, resulting in its characteristic luminescent yellow sheen. This serves a critical role in the buttercup’s lifecycle.
Scientists at the University of Cambridge have shone a light on how the buttercup produces its characteristic yellow glow. Buttercup petals were photographed with an Olympus SZX16 stereomicroscope equipped with an Olympus DP70 digital camera (Olympus, Tokyo, Japan) and a Zeiss Universal Microscope (Zeiss, Oberkochen, Germany) with a Mueller DCM510 camera (Mueller Optronic, Erfurt, Germany).
Why do buttercups glow?
When light hits the buttercup petal it first passes through the outer transparent epidermal cells. Once it reaches the lower starch layer, the light interacts with the starch granules and the pigment-containing cells. The starch granules effectively reflect light due to their high refractive index, while the pigments in the chromoplasts absorb certain wavelengths of light, particularly in the blue-green spectrum. This absorption makes the reflected light appear more yellow.
This combination of reflection by the starch granules and selective absorption by the pigments gives buttercup flowers their characteristic bright, glossy, and yellow appearance. This is believed to be an adaptation for attracting pollinators.
Layers of the buttercup petal
Epidermal layer:
The epidermal layer is an ultrasmooth, transparent layer with pigments that absorb blue-green light, leaving longer-wavelength yellow light to reflect back to the eye [1, 2, 3, 4, 5, 6]. Anchored lightly to a starch layer below, the epidermal layer has air pockets between it and the starch, giving the petals their glossy sheen. The epidermal layer of cells has two extremely flat surfaces which reflect light. One is the top of the cell and the other exists because the epidermis is separated from the lower layers by an air gap[4]. The reflection of light by the smooth surface of the cells and the air layer effectively doubles the gloss of the petals.
Starch layer:
The starch layer lies below the epidermal layer is made of starch-containing parenchyma cells. Parenchyma cells are involved in storage, photosynthesis, and regeneration, and are known for their thin cell walls and large central vacuoles) [1].
The starch layer has a scattering effect, which helps to reflect any light that isn’t absorbed by the pigments in the epidermal layer or the light that is bounced back [2,4]. Electron micrographs demonstrated that the upper epidermis is essentially a thin plate separated from the starch layer by an air space [6].
Mesophyll layer:
The mesophyll layer in buttercup petals is primarily concerned with the display of colour and optical properties that are crucial for attracting pollinators. This layer contains a high concentration of carotenoids, a pigment that gives the petals their characteristic yellow colour. Additionally, the cells in the mesophyll layer of buttercup petals are loosely packed and may contain air spaces. These air spaces, along with the pigments and cell structures, contribute to the complex interaction with light, which not only results in the vibrant colour but also adds to the glossy and sometimes iridescent appearance of the petals.
What is the purpose of shiny petals?
The high density of pigments in this layer also plays a role in heat absorption, and aids in thermoregulation, benefiting the reproductive success of the flower. Combined with the starch granules also present in this layer, which reflect light due to their high refractive index, the pigmented layer contributes to the buttercup’s vibrant and glossy appeal to pollinators.
The bright and glowing appearance of buttercup petals is highly effective in attracting pollinators. This is vital for the reproductive success of the plant.
Due to the shiny surface of the buttercup, a substantial amount of sunlight that hits the petals reflects away. This also reflects some heat to prevent the flower from overheating, and damaging the plant’s reproductive organs or causing the nectar to dry up.
Buttercup flowers track the sun. On cold days, the petals make a cup shape like, a satellite dish, collecting solar energy from sunshine and warming up the flowers, which makes them even more inviting to insects.
Inside each flower petal, special cells create two layers of air that deflect the light reaching them sideways. This makes the petals act together like a parabolic reflector, focusing visible and infrared light on the flower centre. This phenomenon warms up the flowers, making them more attractive to insects [3].
Are there any other flowers with shiny petals?
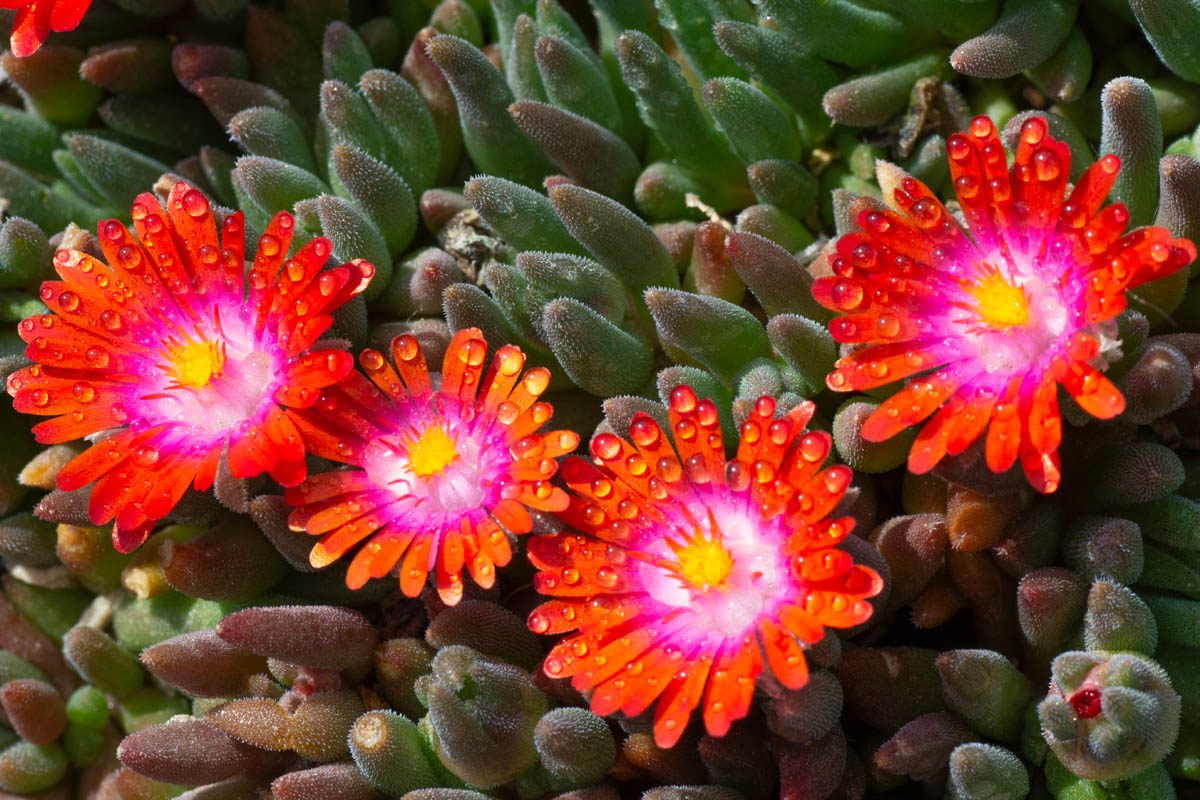
As I was writing this article, I stepped outside and saw my ice plant (Delosperma), with its glossy pink leaves. This hardy little plant grows in white, yellow, red and pink, and the native Australian bees love it.
Other plants with shiny petals include the following:
California poppy (Eschscholzia californica): The California poppy (Eschscholzia californica), has petals that can appear silky and shiny, particularly in bright sunlight. This shininess helps in attracting pollinators.
Ice plant (Mesembryanthemum and Delosperma): The leaves and flowers of ice plants have a shiny or sparkly appearance due to the presence of specialised epidermal bladder cells that reflect light, giving a crystalline effect.
Satin flower (Olsynium douglasii): As the name suggests, the petals of the Satin Flower have a satin-like sheen that can appear shiny.
Lady’s Slipper Orchids (Cypripedioideae): Some species of Lady’s Slipper orchids have shiny pouch-like petals that are used to attract and guide pollinators.
De Kok, L. J., Elzenga, J. T. M., Dijksterhuis, J., & Stavenga, D. G. (2017e). Functional optics of glossy buttercup flowers. Journal of the Royal Society Interface, 14(127), 20160933.
De Kok, L. J., Elzenga, J. T. M., Dijksterhuis, J., & Stavenga, D. G. (2017e). Functional optics of glossy buttercup flowers. Journal of the Royal Society Interface, 14(127), 20160933.
De Kok, L. J., Elzenga, J. T. M., Dijksterhuis, J., & Stavenga, D. G. (2017g). Functional optics of glossy buttercup flowers. Journal of the Royal Society Interface, 14(127), 20160933.
Julia is a writer and landscape consultant from Wollongong with a love of horticulture. She had been an avid gardener for over 30 years, collects rare variegated plants and is a home orchardist. Julia is passionate about learning and sharing her knowledge of plant propagation and plant toxicology. Whether it’s giving advice on landscape projects or sharing tips on growing, Julia enjoys helping people make their gardens flourish.
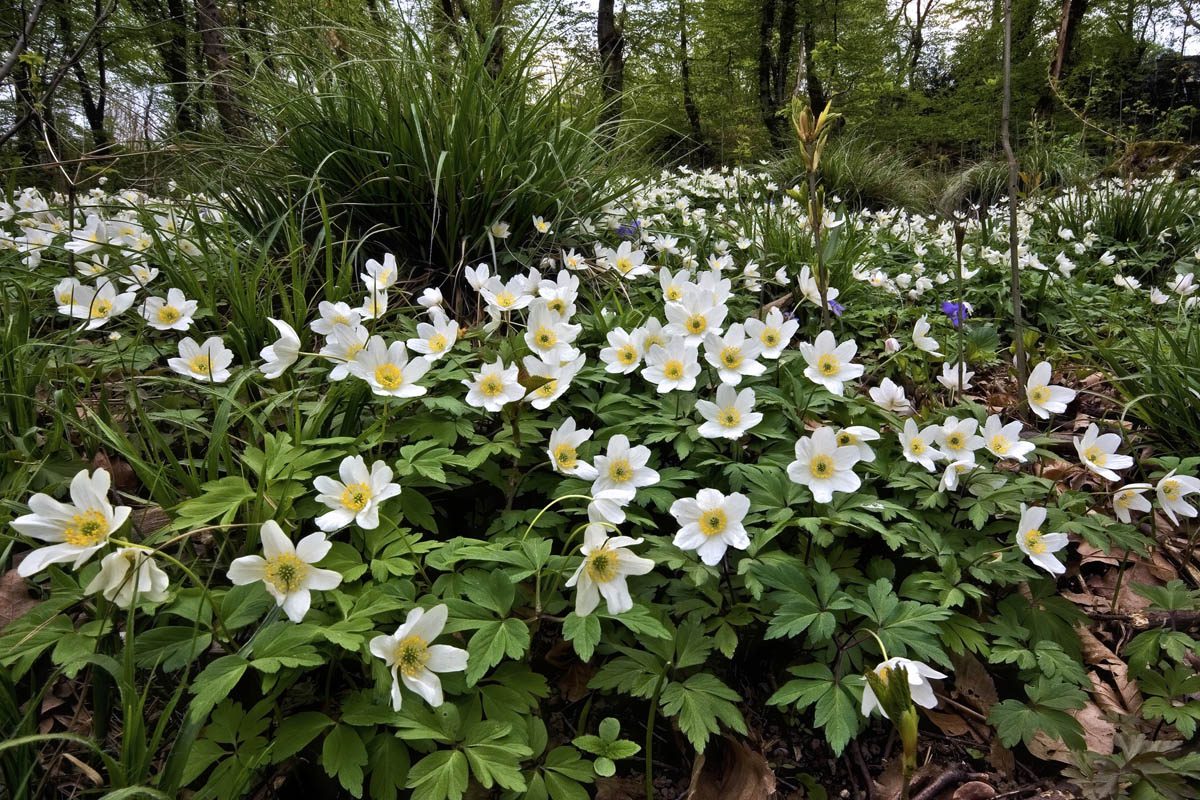
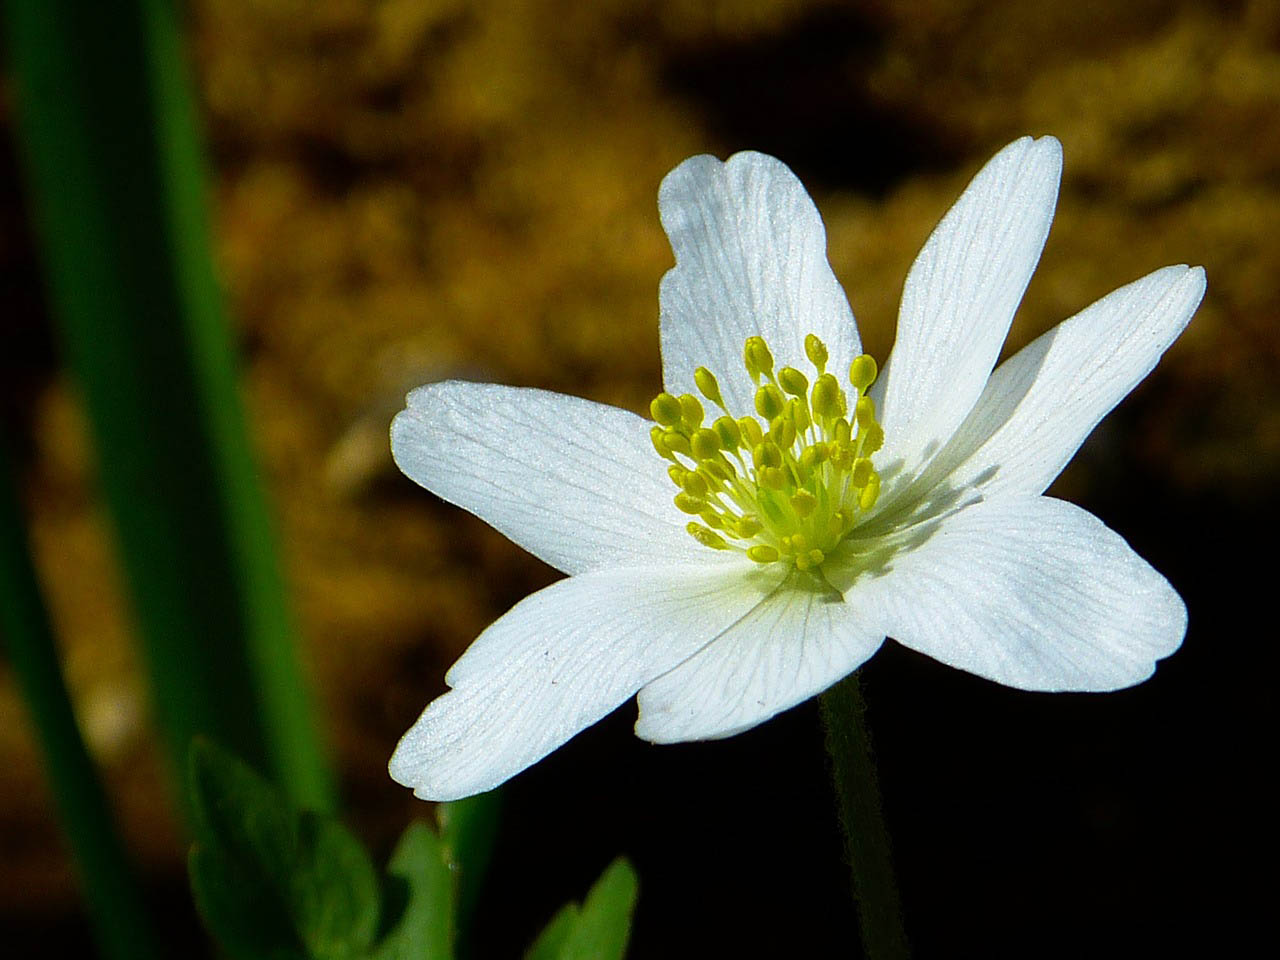
Wood anemone (Anemone nemorosa), is a low-growing, rhizomatous herbaceous perennial in the buttercup family, native to the woodlands of Europe.
These spring ephemerals are one of the first plants to bloom, providing an abundance of single, white flowers, with prominent yellow stamens. Along with bluebells and wild garlic, the wood anemone is indicative that the woodland is ancient.
In the home garden, wood anemone makes a beautiful landscape flower in shady areas.
Name Origins
The name Anemone nemorosa means “windflower of the woods.”
Anemone comes from the Greek word ‘ánemos’ (άνεμος) which means ‘wind‘, hence the common name ‘windflower’.
Nemorosa is derived from the Latin word ‘nemoris‘, which means ‘of the forest‘, reflecting the natural habitat of wood anemone.
Anemone nemorosa
Botanical name:Anemone nemorosa
Family: Ranunculaceae
Common names: Wood anemone, Windflower, European thimbleweed, Crowfoot, Smell fox, Thimbleweed
Native area: Europe
Habitat: Woodland
Mature height: 25 cm (10 in)
Spread: 30 – 60 cm (12 – 24 in)
Flower colour: White
Bloom time: Early spring
Leaf colour: Green
Sun exposure: Full shade to part sun
Soil type: Well-drained, humus-rich soil
Soil pH: 5.5 to 7.5
Appearance
The wood anemone grows to a mature height of 25 cm with a spread of 30-60 cm. As rhizomes spread beneath the ground, wood anemone slowly forms a carpet on the woodland floor.
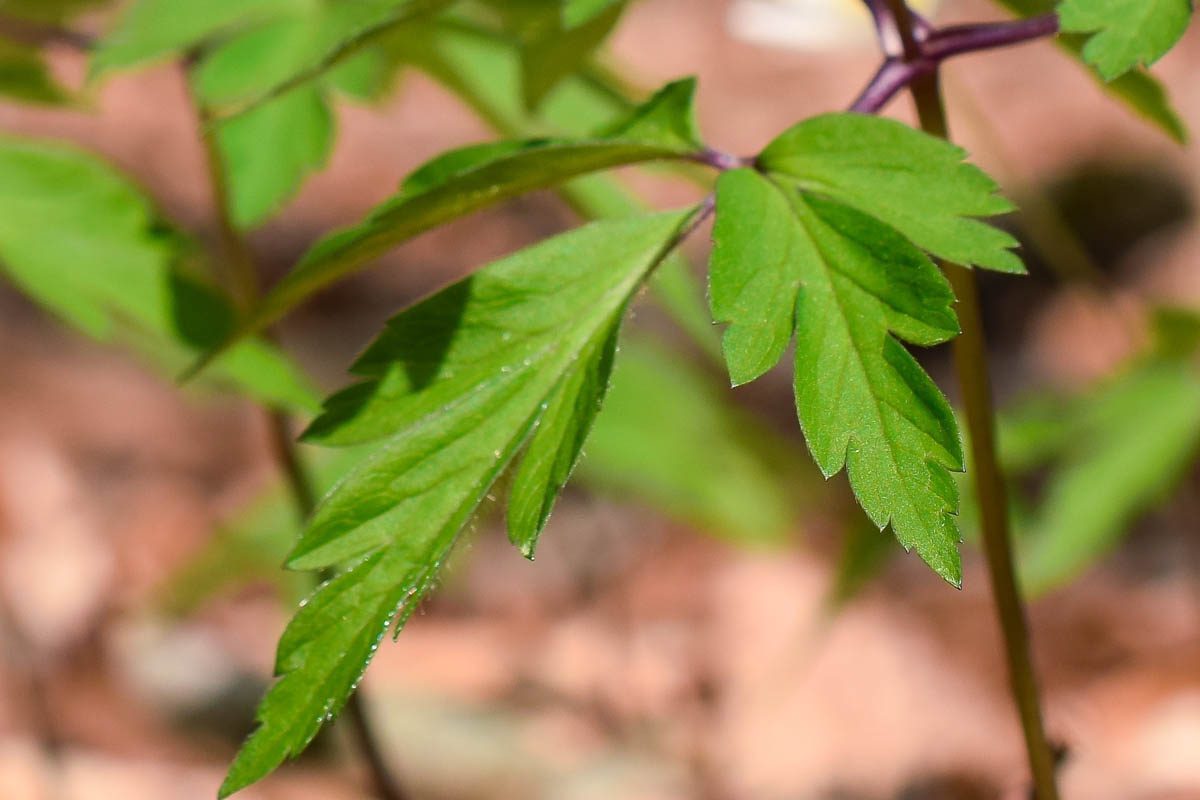
Leaves
Wood anemones have 2.5-5 cm long palmately lobed leaves divided into three main segments, with each segment further divided into narrower lobes, which gives them a feathered appearance. The leaf margins are irregularly toothed, and the leaves are arranged in whorls where they attach at the same point on the stem, below the flowers.
Flowers
Each flower has five to eight petal-like sepals, which are usually pure white but can sometimes have a pink or lilac tinge, on the reverse side. Sepals surround a cluster of yellow stamens at the centre. The flowers are 2.5 cm in diameter, and the shape is described as “radial” or “actinomorphic.” This means that the flower can be divided into two mirror-image halves in multiple ways along its central axis.
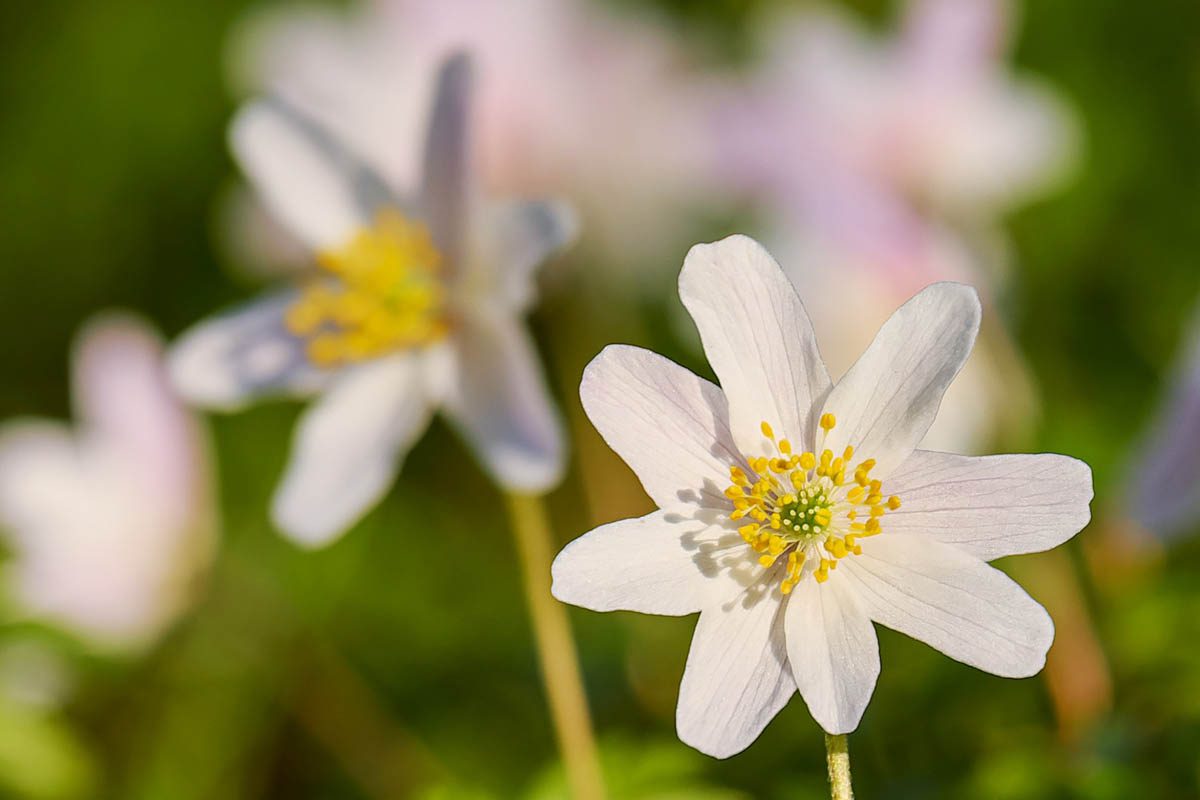
The wood anemone is a spring ephemeral, which means it quickly goes through its growth cycle early in the spring. It emerges in March to April, blooms, grows vegetatively and dies back in a short time frame. This allows the wood anemone to take advantage of available sunlight that reaches the forest floor before the canopy of deciduous trees leafs out.
The leaves emerge from the underground twig-like rhizome (an underground horizontal stem) in late winter to early spring. This is followed by the emergence of its star-shaped white flowers. Hoverflies and bees are major pollinators of wild anemones, and after pollination, pods develop from the flowers. The achenes, which have fatty attachments called elaiosomes, are dispersed by wind and ants that are attracted to these structures.
After flowering, the wood anemone continues to grow vegetatively. During this vegetative phase, the plant will grow leaves that photosynthesize to produce simple sugars. These simple sugars are converted to more complex carbohydrates in a process known as biosynthesis.
These complex carbohydrates are transported through the plant’s phloem, the vascular tissues that distribute nutrients throughout the plant. Once the carbohydrates reach the rhizomes, they are converted back into starches or other storage forms. These storage carbohydrates are packed into the cells of the rhizomes. This energy reserve is crucial for the plant to survive dormancy and regenerate the following year.
During this period, the rhizomes may spread, leading to the growth of new plants. By late summer the above-ground parts of the wood anemone begin to die back and the plant remains dormant from autumn until late winter. Energy is conserved in the rhizomes, which will remain dormant throughout the winter.
Each spring, the cycle begins with the rhizomes sending up new shoots. In the right habitat, wood anemones can form extensive carpets of flowers over time as their rhizomes slowly spread. They can also propagate through seed, although this is a less common method of reproduction for them.
Where is the Best Place to Plant Wood Anemone?
Wood anemones flourish under the canopy of deciduous trees, which provide dappled sunlight. The light conditions simulate the natural opening and closing of the woodland canopy through the seasons.
Soil should retain moisture without becoming too waterlogged. Incorporate organic matter such as mushroom compost or cow manure to improve soil structure, moisture holding abilities and provide nutrients for optimal plant growth.
How to Sow Wood Anemone Seeds
Sowing wood anemone seeds is a challenge due to their complex germination requirements, as well as the high percentage of sterile seeds.
The best time to sow wood anemones is in autumn when the seeds are fresh, and they will experience a period of cold stratification over winter. If growing in spring, seeds will need a period of cold stratification for 12 weeks. Place in a plastic bag in the refrigerator.
Location: Sow seeds in full shade to dappled sun.
Seed selection: Always select fresh seeds in late summer or early autumn. The seeds should be dry, brown and fall easily out of the seedheads when shaken. Check with local authorities if you plan to collect wood anemone seeds from the wild.
When to sow: If growing in autumn, sow the seeds in a container of soil or directly into a garden bed. Place the seeds on top of the soil mix as wood anemone seeds require light to germinate. Spring-sowed wood anemone seeds will have had to be cold-stratified before sowing (see above).
Watering: Water the seeds with a fine mist to settle the soil and ensure good seed-to-soil contact. Adequate moisture is crucial after cold stratification for the seeds to absorb water, which triggers the expansion and breaking of the seed coat.
Time to germinate: It typically takes 3-4 weeks for wood anemone seeds to germinate, but may take longer.
Growing Wood Anemone From Rhizomes
Wood anemone has developed a reproductive strategy that emphasizes vegetative propagation over seed dispersal. This is an adaptation to the stable, often undisturbed environments where it typically thrives, such as deciduous woodlands. Rhizomes should be healthy and firm, avoid dry, overly soft or shrivelled ones.
The best time to plant your wood anemone rhizomes is in autumn, a few weeks before the first frost. This will allow them to establish a healthy root system before winter.
Prepare the soil by loosening it to a depth of 30 cm, and mix in some compost or well-rotted cow manure.
Soak the rhizomes in water a few hours before planting to rehydrate them.
Plant the rhizomes horizontally in the soil about 5-7.5 cm deep, and about 10-15cm apart.
After planting, water the soil thoroughly to help it settle around the rhizomes.
Apply a layer of mulch after planting to conserve water and protect from harsh weather conditions.
As the plants emerge in spring, maintain water, especially if the weather is dry. Be careful not to overwater.
Apply a light application of a well-balanced fertiliser.
Remember, wood anemones die back after they have produced seeds, but will return the following spring.
How Does Wood Anemone Reproduce?
Wood anemone reproduces sexually through seed production and vegetatively through rhizomatous growth. The rhizomes grow horizontally just below the soil surface. As they grow, they extend outward from the parent plant they produce adventitious roots and shoots at nodes along their length. The roots anchor the rhizomes into the soil, while the shoots will grow upwards to become new above-ground plants. Rhizomatic growth is an effective way for the wood anemone to propagate itself, particularly in shady woodland areas where seed germination may be less reliable.
Flowers appear in spring and are pollinated by insects, leading to the production of seeds. Once the seeds mature, they are dispersed into the environment. Germination is a slow process, as wood anemones require a period of cold stratification to mimic the cold of winter.
How Fast Do Wood Anemones Spread?
Wood anemones are known to spread slowly and it is said that they can take up to 100 years to spread across a distance of about 2 metres, which equates to 2 cm per year. The rate at which wood anemones spread can vary depending on soil conditions, moisture, light, and competition from other plants.
Growing Wood Anemone in the Garden
Wood anemone is a shade-loving plant that is ideal for low-light areas such as under trees or in sheltered nooks. This characteristic allows wood anemone to illuminate low-light areas with its delicate blossoms, creating a woodland feel. With its adaptability to cooler, shaded areas, the wood anemone is an excellent choice for gardeners looking to bring life and colour to less sunny spots that might challenge other sun-seeking plants.
Wood anemone forms dense carpets of lush foliage over time, which makes it an excellent ground cover in shady areas. This dense growth in woodlands can help stabilise soil and prevent erosion during prolonged rainy seasons.
Caring for Wood Anemones
Provide a woodland-like environment with dappled shade or partial sun, and maintain a well-draining, nutrient rich soil. Keep the soil consistently moist, but be careful not to over-water which can lead to root rot.
Apply a light layer of compost or a balanced fertiliser with an equal ratio of Nitrogen (N), Phosphorus (P), and Potassium (K), such as a 10-10-10 or a 14-14-14.
Nitrogen (N) helps with leafy, vegetative growth.
Phosphorus (P) is important for root development and flower production.
Potassium (K) is essential for the overall health and vigour of the plant.
Since wood anemones are grown primarily for their flowers, and they have a period of dormancy after flowering, it’s not necessary to apply a high-nitrogen fertiliser. A balanced fertiliser will ensure that the plants have all the nutrients they need for healthy root development, flowering, and overall growth. During winter, protect the rhizomes in colder regions by adding an extra layer of mulch, and avoid excessive disturbance around the plant’s root zone.
Dividing Wood Anemones
The best time to divide wood anemones is in the late summer or early autumn after the foliage has died back and the plants are dormant.
Gently dig around the clump of anemones you want to divide, being careful not to damage the rhizomes. Lift the clump out of the soil with as much of the root system intact as possible.
Shake away any remaining soil and remove dead foliage from the rhizomes.
Carefully tease apart the rhizomes with a sharp knife (I find a bread knife is the best tool to divide underground stems and rhizomes). Each section should have at least one growth point (bud) from which new shoots can emerge.
Plant the newly divided rhizome sections immediately at a depth of 10 cm (4 inches). Provide plenty of space between them for growth.
Keep the soil moist but not waterlogged as the rhizomes establish themselves. Mulching can help to retain moisture and suppress weeds.
Ecological Importance of Wood Anemone
Wood anemone plays an important role in the ecosystem of temperate woodlands. As one of the first spring flowers to bloom, it provides early-season nectar for pollinators like bees, hoverflies and beetles. These insects are critical for the pollination of many other plant species, thus supporting the entire woodland food web.
Indicator of Ancient Woodland
The presence of wood anemones is an indicator of an ancient woodland, which are forests that have existed since 1600. Wood anemone contributes to the diversity of the ecosystems and its preference for stable, undisturbed habitats means that large colonies are a sign that the woodland is healthy and thriving.
Soil Stabilisation and Nutrient Cycling
The dense carpet of foliage formed by wood anemones stabilises the soil and reduces erosion, particularly in the spring when other plants have not yet grown. This ground cover acts as a mulch to maintain soil moisture levels. As the leaves die back, they decompose and add organic matter to the soil, enhancing its structure and fertility and promoting nutrient cycling.
Symbiotic Relationships
Wood anemone has a symbiotic relationship with ants (myrmecochory). The seeds of the wood anemone have a fatty appendage called an elaiosome, which attracts ants. The ants take the seeds to their nests to feed on the elaiosomes, thereby aiding in the dispersal of the seeds away from the parent plant. This process ensures wider colonisation and genetic diversity within the species.
Habitat for Fauna
The lush foliage provides a habitat for many small animals and invertebrates. The microclimate under the leaves can be a haven for small mammals, amphibians, and insects, offering them protection from predators and harsh weather.
Conservation and Biodiversity
By conserving wood anemone and its habitat, we are protecting a whole suite of associated species. The decline of native woodlands can lead to a loss of these plants and the complex web of life that depends on them. Efforts to conserve wood anemone habitats contribute to broader conservation goals, such as maintaining biodiversity, protecting native species, and preserving the ecological functions of our woodlands.
Is Wood Anemone Toxic to Cats and Dogs?
Wood anemone is toxic to both dogs and cats. The toxic compound is protoanemonin, which can be irritating and harmful to pets if ingested. If a dog or cat consumes parts of the wood anemone plant, they may experience symptoms such as vomiting, diarrhea, drooling, or abdominal pain. Contact with the plant can also cause skin irritation.
Given the irritant properties of anemonin and its potentially harmful effects, it is advisable to handle plants containing this compound with caution and to keep them away from pets and children.
Wood Anemone Story
Anemone was a beautiful nymph, and Zephyrus, one of the four Anemoi (wind gods)-Boreas (North), Zephyrus (West), Notus (South) and Eurus (East).
Zephyrus (also known as Zephyr) the god of the west wind, was married to Chloris (also known as Flora), the goddess of flowers and spring. When Flora discovered her husband’s affection for Anemone, she used her powers to turn Anemone into a flower, so she could no longer be with Zephyr.
Flora cast a spell that transformed Anemone into a delicate flower, causing Zephyr to lose interest in her. Boreas, the god of the north wind fell in love with Anemone, despite her being a flower. However, Anemone was not interested in him. In his frustration at being rejected, Boreas used his chilling winds to blow open the petals of Anemone.
Zephyr loses interest in Anemone as a flower preferring her as a nymph. However, Boreas another wind god (North Wind) represented the winter winds, fell in love with her despite her being a flower.
Boreas tried in vain to woo her but Anemone was not at all interested in him. An angry Boreas blows on her petals every spring.
Julia is a writer and landscape consultant from Wollongong with a love of horticulture. She had been an avid gardener for over 30 years, collects rare variegated plants and is a home orchardist. Julia is passionate about learning and sharing her knowledge of plant propagation and plant toxicology. Whether it’s giving advice on landscape projects or sharing tips on growing, Julia enjoys helping people make their gardens flourish.
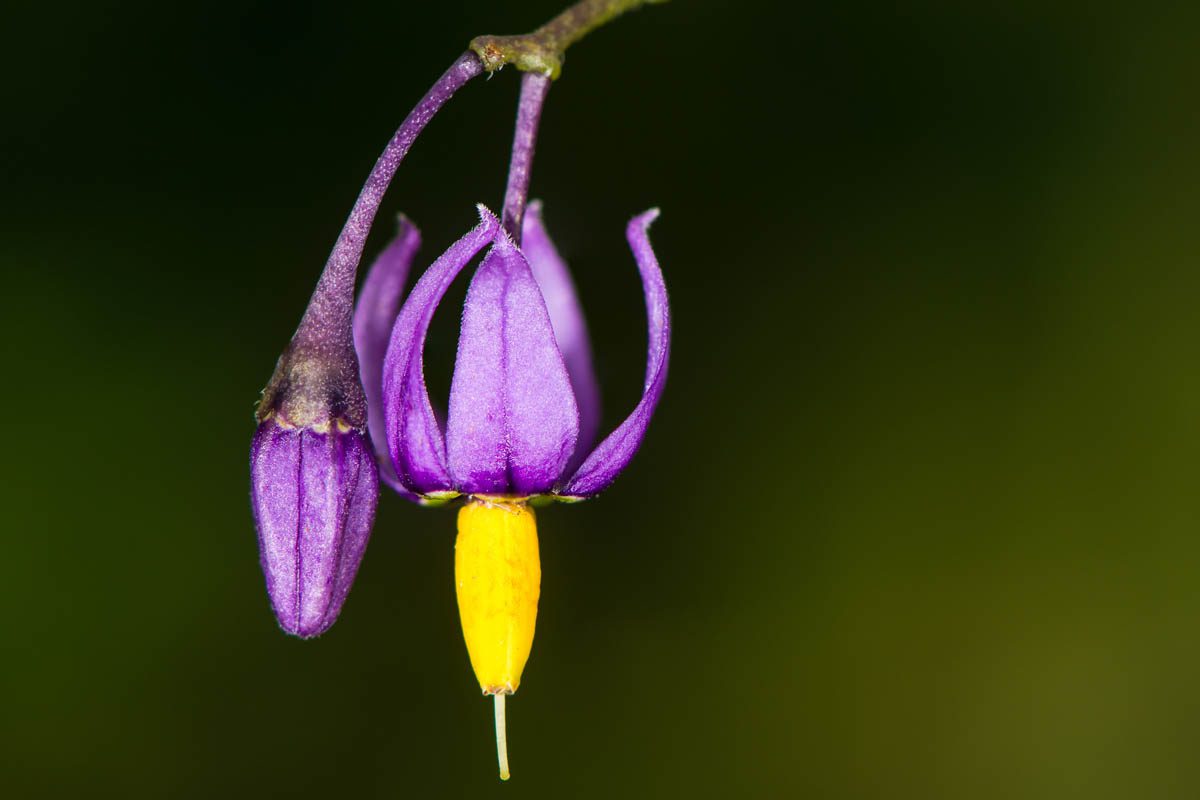
Atropine is a tropane alkaloid that naturally occurs in plants of the nightshade family (Solanaceae). Members of this family include deadly nightshade (Atropa belladonna), henbane (Hyoscyamus niger), Angel’s trumpet (Brugmansia spp.) and Jimson weed (Datura stramonium). Atropine acts as an anticholinergic agent, blocking the action of the neurotransmitter acetylcholine in the central and peripheral nervous system.
Julia is a writer and landscape consultant from Wollongong with a love of horticulture. She had been an avid gardener for over 30 years, collects rare variegated plants and is a home orchardist. Julia is passionate about learning and sharing her knowledge of plant propagation and plant toxicology. Whether it’s giving advice on landscape projects or sharing tips on growing, Julia enjoys helping people make their gardens flourish.
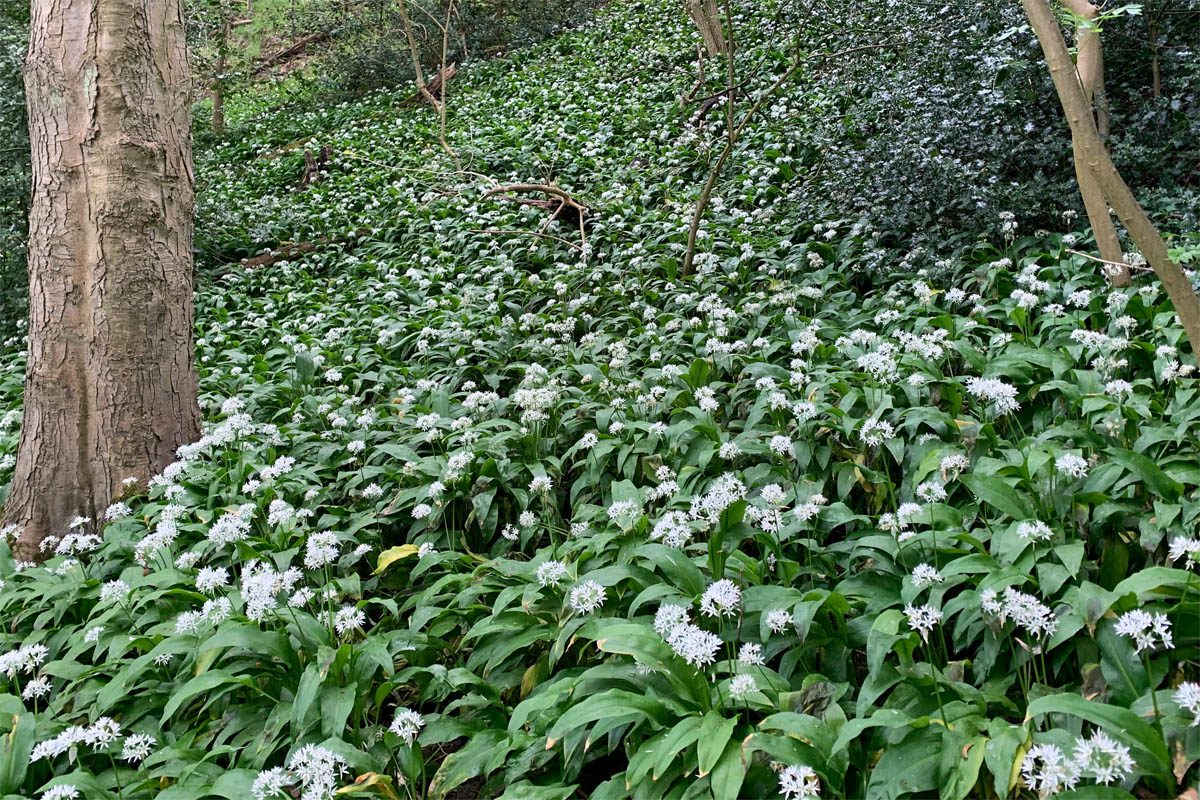
Also known as ramsons, or bear’s garlic, wild garlic (Allium ursinum L.) is a bulbous herbaceous perennial belonging to the Amaryllidaceae family. Native to the Europe and Asia, wild garlic has a long history of medicinal and dietary use. Its native habitat is moist, shaded areas such as woodlands and forests. In mid-spring, wild garlic carpets the ground with its broad, green leaves and star-shaped white flowers. The entire plant emits a pungent, garlic-like aroma, hence its common name.
I grew up in North Yorkshire, England and visit family every few years. Nothing reminds me more of my homeland than the sight and smell of wild garlic and English bluebells. During May, the woodlands are carpeted with both of these native beauties. In fact, bluebells and wild garlic are key indicators that a woodland is ancient.
The botanical name Allium ursinium his of Latin origin. “Allium” is the genus to which wild garlic, along with onions, leeks, and many other similar plants, belongs. Allium is Latin for garlic. The species name ursinium, comes from the Latin word ursus, which means bear and is believed to be due to the observation that bears would eat the plant after coming out of hibernation in spring. So, Allium ursinium is roughly translated to bear’s garlic.
Is wild garlic safe to eat?
Wild garlic contains vitamins A and C, calcium, phosphorous and iron. The leaves, flowers and bulbs of wild garlic are all edible and have a mild-garlic taste. Wild garlic has also been used in traditional medicine and has a number of potential therapeutic effects.
Compounds similar to those found in conventional garlic (Allium sativum) are present in wild garlic which may enhance the effects of blood-thinning and anticoagulant medications. These compounds include allicin, adenosine and ajoene which may inhibit platelet aggregation. Platelet aggregation is the process by which platelets adhere to each other to form clots. People taking anticoagulants or blood thinners such as warfarin or aspirin should seek the advice of their doctor before consuming wild garlic.
Is wild garlic the same as garlic?
Wild garlic (Allium ursinum) and garlic (Allium sativum) are different species of plant. However, they both belong to the same family. Garlic is widely grown commercially and the bulb of the plant is most commonly consumed. Wild garlic generally isn’t grown on a commercial scale, and the leaves are typically used.
Wild garlic (Allium ursinum)
Cultivated garlic (Allium sativum)
Physical characteristics
Broad, flat, elliptical leaves, white star-shaped flowers, and small, elongated bulbs.
Central stalk with long, flat leaves growing from a large, round bulb, made up of multiple cloves.
Growth habits
Woodland perennial growing in shady, damp environments. Often carpets the ground in the spring.
Typically grown as an annual in sunny, well-drained garden beds or fields.
Flavour
Mild, sweet garlic flavour.
Strong, pungent garlic flavour.
Culinary uses
Leaves are used in salads, pestos, and soups. Flowers are used as a garnish.
Cloves are used in a wide variety of dishes. Can be used raw, sautéed, roasted, or even fermented (as in black garlic). Scapes are used in stir-fries and pestos.
Description
Wild garlic. Photo by Julia Wilson.
Wild garlic grows from a bulb and forms dense clumps of leaf rosettes and later on, star-shaped, white flowers in woodland habitats. The leaves appear in late winter followed by white, star-shaped flowers. The plant reaches a height of 30 cm.
Leaves:
The leaves are broad, long, and elliptical, and can grow up to 25 cm long. They have a vibrant green colour, are shiny on the upper side and matt on the underside. The leaves grow in basal rosettes from the bulb, and are tender to touch. When bruised, they emit a mild garlic-like scent.
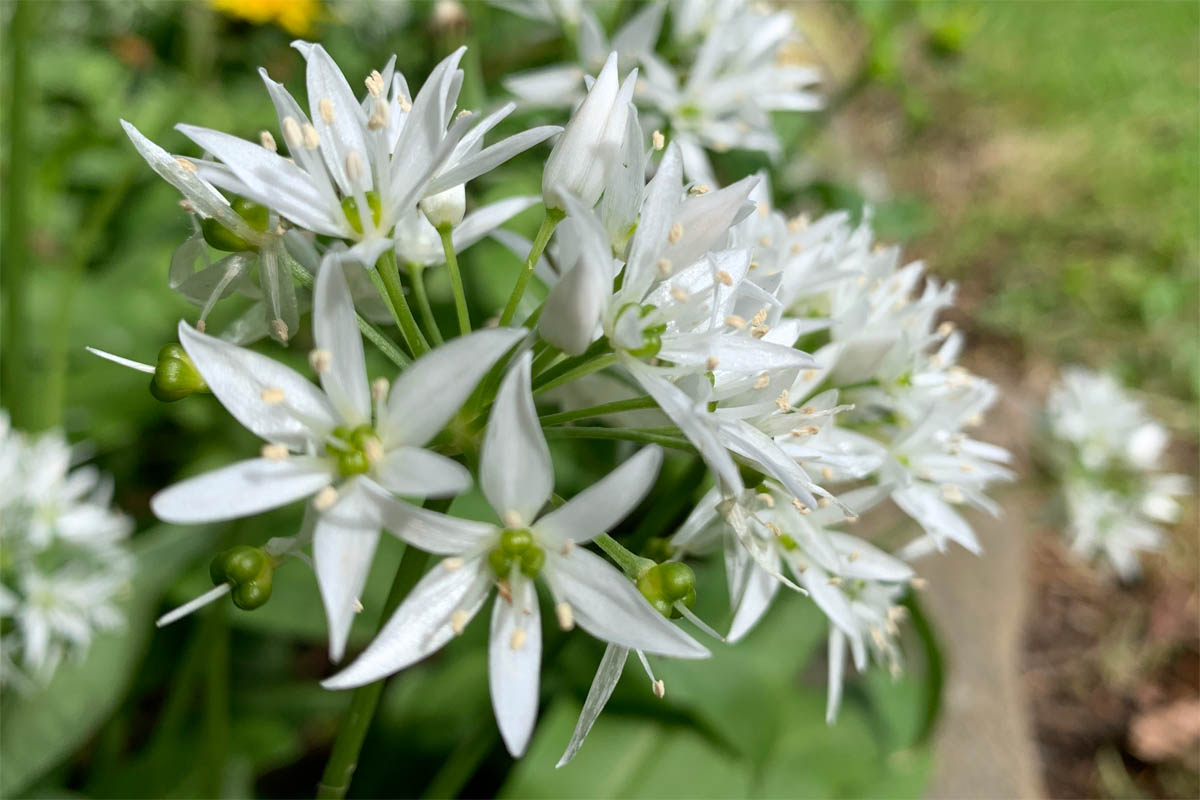
Flowers:
Wild garlic produces flowers in late spring. Each plant forms a solitary stem that rises above the leaves on a single stem in a pherical cluster known as an umbel. The umbel contains several flowers, each with six white petals forming a star-shape.
The flowers have both male and female reproductive organs (hermaphrodite), and are pollinated by bees and other insects. Following pollination, a three-sided pod develops which eventually darkens and dries out as it matures.
Bulbs:
The bulbs are small, white, round or slightly elongated and are encased in a thin, papery covering known as a tunic. Bulbs are modified stems that serve as storage organs for the plant. In the right conditions, these bulbs can split and multiply, a form of asexual reproduction that can result in large colonies of wild garlic.
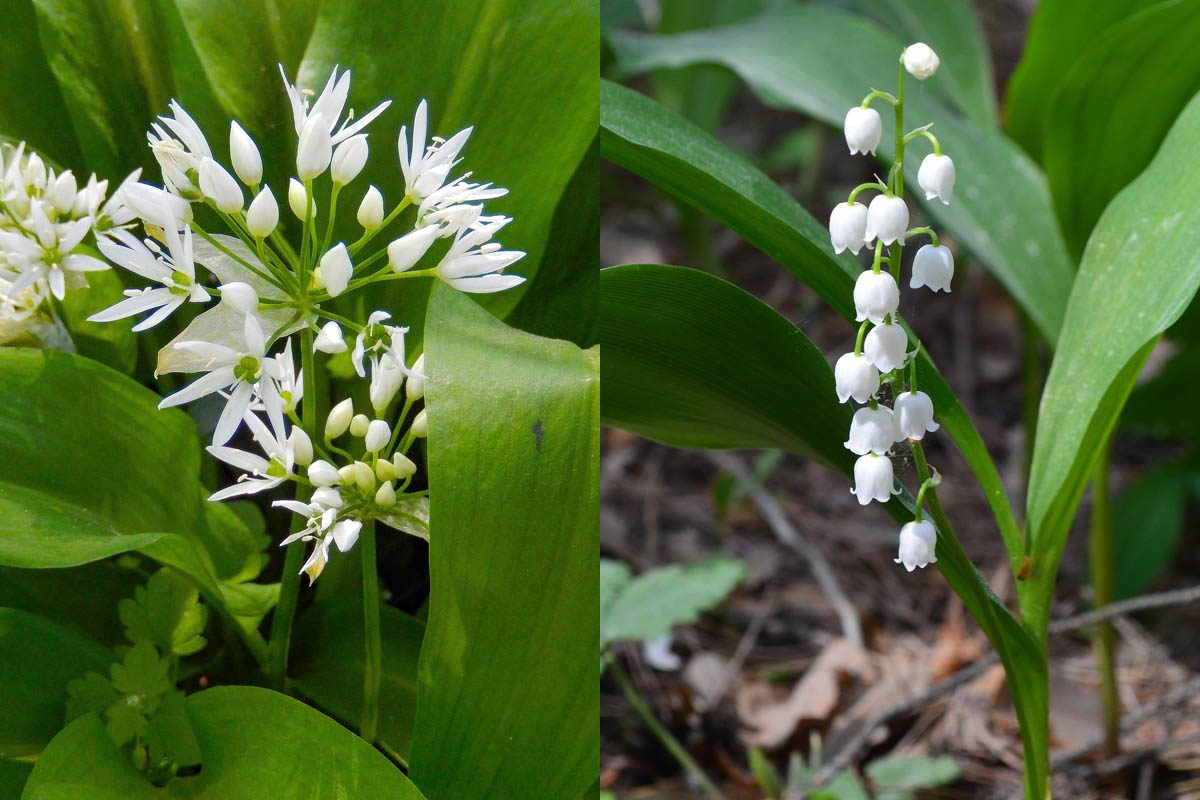
Difference between wild garlic and lily of the valley
For people who forage, it is important to know the difference between lily of the valley and wild garlic. Lily of the valley produces similar strap-like leaves in spring but is highly toxic. The toxic property is convallarin, a cardiac glycoside.
Both plants can be found growing in a similar woodland habitat, and their leaves are similar. The presence or absence of a garlic-like smell when the leaf is crushed is the most prominent feature. Only wild garlic emits this scent.
Feature
Wild Garlic
Lily of the Valley
Family
Amaryllidaceae
Asparagaceae
Native To
Europe and Asia
Northern Hemisphere
Leaves
Broad, flat, elongated leaves growing from the base
Elliptical to lanceolate leaves growing from a single stem
Scent
Distinctive garlic scent, especially when crushed
No garlic scent, flowers are sweetly fragrant
Flowers
Star-shaped, white flowers in a round umbel (cluster)
Tiny, bell-shaped, white or pale pink flowers hanging down in a raceme
Flowering time
Late spring (Apr-June in the Northern Hemisphere)
Late spring (May-June in the Northern Hemisphere)
Fruit/Seed
Forms a green seed pod with black seeds
Forms a red or orange berry
Edibility
The entire plant is edible and commonly used as a food source
The entire plant is poisonous
Sowing wild garlic seeds
Wild garlic seeds can be purchased from a reputable nursery or online.
When to sow: The seeds should be sown in autumn (fall), to reflect the plant’s natural lifecycle. Autumn sowing allows the seeds to go through a chilling period called ‘cold stratification’ which is crucial for the seeds to break dormancy and germinate. If you are unable to sow in autumn, you can artificially stratify the seeds in a refrigerator for a month.
It is important to remember that it can become quite prolific and may crowd out other plants. In a garden setting, consider containing it within or growing it in pots to control its spread.
Waiting for germination: patience is required
The key to successful germination is patience and consistent care. Some seeds germinate quickly, while others take much longer, even under the same conditions. Wild garlic seeds can remain dormant for 1-2 years. This extended period of dormancy is a natural survival strategy that helps the plant survive unfavourable conditions.
Breaking dormancy starts with stratification, a period of cold, moist conditions that can be facilitated by sowing the seeds in autumn, and allowing winter to provide the necessary cold period. However, even with stratification, seeds may take a considerable amount of time before they germinate.
This long wait can test even the most patient gardener and it is tempting to give up. But, it is crucial to maintain consistent care and keep the soil moist at all times. Even though you can’t see any activity above ground, there is a lot happening beneath the surface.
Once the seeds have germinated, protect them from harsh weather and pests. It will take another few years for the seedings to reach maturity and produce flowers.
It is also important to remember that wild garlic is a perennial, once it establishes, it will return year after year and reward you with a long-lasting, low-maintenance plant.
Life cycle
Wild garlic flowers with developing seed pods. Photo by Julia Wilson.
Wild garlic is a perennial plant which means it lives for several years. In winter, wild garlic lies dormant in its below-ground bulb. The bulb is a storage organ that allows plants to store nutrients and energy during the unfavourable conditions of winter. As temperatures rise and the days become longer, wild garlic begins to sprout, sending up broad, shiny green leaves which carpet the ground in areas where it grows densely.
The leaves are followed by a single, spherical umbel (cluster) of small, white, star-shaped flowers on a solitary stem. After flowering, the plant produces green seed pods which contain the seeds. At maturity in early summer, the pods open to release their seeds, which fall to the ground and germinate the following year. After flowering and seed production, the leaves die back in mid-summer, and the plant goes into a state of summer dormancy. As the leaves die back, they provide energy, which is stored in the bulb for the next growing season. Wild garlic remains dormant during late summer, autumn and winter.
This cycle repeats each year, with wild garlic plants potentially spreading further if conditions are favourable. Over time, the original bulb produces new bulbs, known as offsets or daughter bulbs. These form alongside the original bulb, growing from the base of the mother bulb.
It takes 4-5 years for wild garlic to reach sexual maturity and an average lifespan of 8-10 years.
Care and maintenance of wild garlic
Climate
Cold, temperate, sub-tropical
Soil
Light to medium, organically-rich, damp, but well-drained soils with a pH range of 5.8-6.8.
Prepare the garden by adding compost or well-rotted manure to improve the nutrient content and structure.
Sowing depth and spacing
Sow at a depth of 4 mm and 10 cm (4 inches) apart. This will allow each plant enough space without competition for water and nutrients.
When to sow
Autumn/early winter (cold stratification required if sown outside this period)
Germination time
2-3 weeks for older seeds to 1 year for young seeds
Location
Wild garlic naturally grows in woodlands and prefers locations with partial to full shade. While it can tolerate some sunlight, avoid direct sunlight.
Moisture levels
Wild garlic tends to grow in areas of consistent moisture. Choose a location that isn’t prone to drying out, however, the soil should be well-draining to prevent waterlogging.
Leaf colour
Green
Flower colour
White
Height
30 cm
Toxicity
Toxic to pets in large amounts
Temperature ranges
-28 to 32°C (-18 to 90°F)
Fertilising
Typically doesn’t require much fertilization, particularly if it’s planted in rich, well-composted soil
Companion plants
Wild garlic grows well well with other woodland and shade-loving plants such as bluebells, ferns, Solomon’s seal, wood anemone and hosta.
Pests and diseases
Pests:
Slugs and snails: These can sometimes be a problem, especially in wet and humid conditions. Handpick them off the plants, use slug traps (beer in a cup works well), or consider using an environmentally-friendly slug repellent. Always be careful using snail and slug treatments around pets and children.
Onion fly: Onion flies (Delia antiqua) are known to affect members of the Allium family. The female lays her eggs at the base of the plant, and the emerging larvae then burrow into the bulb, causing damage.
Diseases:
White rot: White rot is a fungal disease caused by Sclerotium cepivorum that affects the Allium family. Symptoms of white rot include yellowing, wilting and dieback of the leaves. Leaf decay begins at the base of the outer leaves, causing the leaf to collapse. Once a plant is infected, it cannot be cured and should be removed to prevent the spread.
Downy mildew: A fungal disease caused by Peronospora sparsa that can occasionally affect wild garlic, causing discoloured patches on leaves. Management includes improving air circulation around plants and avoiding wetting leaves when watering. Fungicides can be used if the problem persists.
Maintaining good garden hygiene, ensuring adequate space for air circulation and regularly checking plants for signs of pests or disease can help to reduce pests and diseases. Be careful to not overwater your wild onion as this can contribute to fungal diseases. Always remove affected plants and do not compost.
When to harvest wild garlic
Wild garlic grows from early spring until mid-summer, at which point the leaves die back. Leaves are at their most tender before the flowers bloom. The flowers are also edible, with a milder and sweeter flavour. They can be used in salads or dried to make a flavoured salt.
Never pick more than you need and do not remove more than a third of the leaves from each plant. The leaves can be carefully cut off with a pair of scissors or a sharp knife. Harvest the leaf from its base where it connects to the stem, not from the middle or the tip. Place the leaves in a basket or a breathable bag. Avoid stuffing them into a tight space which could cause pressure and result in bruising. Do not pull on the plant as you may displace the bulb and kill the plant.
Wild garlic leaves are delicate and best used soon after picking. The longer they are stored, the more likely they are to bruise or wilt.
Storing wild garlic
Store in leaves the salad crisper in the refrigerator for up to three days. The flowers are best consumed on the same day.
Is it illegal to take wild garlic?
In the United Kingdom, it is legal to forage for wild garlic, however, it is illegal to dig up the bulb, which will prevent the plant from returning the following year. Simply snip off the foliage and some (not all) leaves, and leave the bulb intact.
It is illegal to forage on private property without the landowner’s permission, no matter what you are collecting.
Even where it is legal to forage, it is important to do so responsibly to protect the environment and ensure that the plants can continue to grow in the future. Do not take more than you need and be careful not to damage the plant or its habitat.
It is a good idea to check the specific regulations in your area or consult with a local naturalist or foraging group before foraging.
Wild garlic recipes
Wild garlic soup
Ingredients:
100g wild garlic leaves
1 medium onion (approximately 150g), diced
1 medium potato (approximately 200g), diced
1 litre vegetable stock
Salt and pepper to taste
1 tablespoon of olive oil
100ml cream
Instructions:
Add olive oil to a pan and saute onion and garlic until translucent
Add the potato and vegetable stock. Bring to a boil, then reduce heat and simmer until the potato is soft.
Add the wild garlic leaves and simmer for another 2 minutes.
Blend the soup with a hand blender until smooth. Season with salt and pepper.
Stir in the cream and heat gently. Serve hot.
Wild garlic pesto
Ingredients:
80g wild garlic leaves
50g Parmesan cheese, grated
50g pine nuts
150ml olive oil
Salt to taste
Instructions:
Toast the pine nuts lightly in a dry pan, then leave to cool.
Combine the wild garlic leaves, Parmesan cheese, and cooled pine nuts in a food processor and blend until finely chopped.
Slowly add the olive oil while the processor is running until you have a thick paste. Season with salt.
Wild garlic and goat cheese tart
Ingredients:
200g wild garlic leaves
1 pre-made pastry crust (around 320g)
200g soft goat cheese
3 eggs
200ml cream
Salt and pepper to taste
Instructions:
Preheat the oven to 180°C.
Blanch the wild garlic leaves in boiling water for 1 minute, then drain and squeeze out excess water.
Spread the pastry crust into a tart dish. Arrange the blanched wild garlic leaves on top, then crumble over the goat cheese.
In a bowl, whisk together the eggs, cream, salt, and pepper. Pour this mixture over the wild garlic and goat cheese.
Bake in the preheated oven for about 25-30 minutes or until the filling is set and golden.
Wild garlic hummus
Ingredients:
1 can of chickpeas (approximately 400g), drained and rinsed
50g wild garlic leaves
2 tablespoons tahini
Juice of 1 lemon
3 tablespoons olive oil
Salt to taste
Instructions:
Blend chickpeas, wild garlic leaves, tahini and lemon juice in a food processor until smooth.
While the processor is running, slowly drizzle in the olive oil. Blend until the hummus is creamy and smooth.
Season with salt and serve with pita bread or vegetable sticks.
Wild garlic and potato gratin
Ingredients:
1kg potatoes, peeled and thinly sliced
200g wild garlic leaves
500ml cream
100g grated cheese
Salt and pepper to taste
Instructions:
Preheat your oven to 180°C.
Blanch the wild garlic leaves in boiling water for 1 minute, then drain and squeeze out excess water.
Layer the potatoes and wild garlic leaves in a baking dish. Season each layer with salt and pepper.
Pour over the cream, ensuring that it covers the potatoes.
Sprinkle the grated cheese over the top.
Bake for about 1 hour, or until the potatoes are tender and the top is golden brown.
Wild garlic risotto
Ingredients:
300g Arborio rice
1 litre vegetable stock
1 medium onion (approximately 150g), diced
2 tablespoons olive oil
100g wild garlic leaves
100g Parmesan cheese, grated
Salt and pepper to taste
Instructions:
Heat the olive oil in a large pan and sauté the onion until translucent.
Add the Arborio rice and stir until the grains are coated in the oil.
Add a ladleful of vegetable stock to the pan and stir until it’s absorbed. Continue adding stock, one ladle at a time, until the rice is cooked. This should take about 18-20 minutes.
Chop the wild garlic leaves and stir them into the risotto, along with the Parmesan cheese.
Season with salt and pepper and serve hot.
Wild garlic and mushroom pasta
Ingredients:
300g pasta
2 tablespoons olive oil
200g mushrooms, sliced
100g wild garlic leaves
Salt and pepper to taste
Parmesan cheese, to serve
Instructions:
Cook the pasta according to the package instructions.
Meanwhile, heat the olive oil in a pan and sauté the mushrooms until golden.
Chop the wild garlic leaves and add them to the pan, cooking until they wilt.
Drain the pasta, reserving a cup of the pasta water.
Add the cooked pasta to the pan with the mushrooms and wild garlic, tossing to combine. If needed, add some of the reserved pasta water to loosen the sauce.
Season with salt and pepper and serve with a sprinkling of Parmesan cheese
Julia is a writer and landscape consultant from Wollongong with a love of horticulture. She had been an avid gardener for over 30 years, collects rare variegated plants and is a home orchardist. Julia is passionate about learning and sharing her knowledge of plant propagation and plant toxicology. Whether it’s giving advice on landscape projects or sharing tips on growing, Julia enjoys helping people make their gardens flourish.
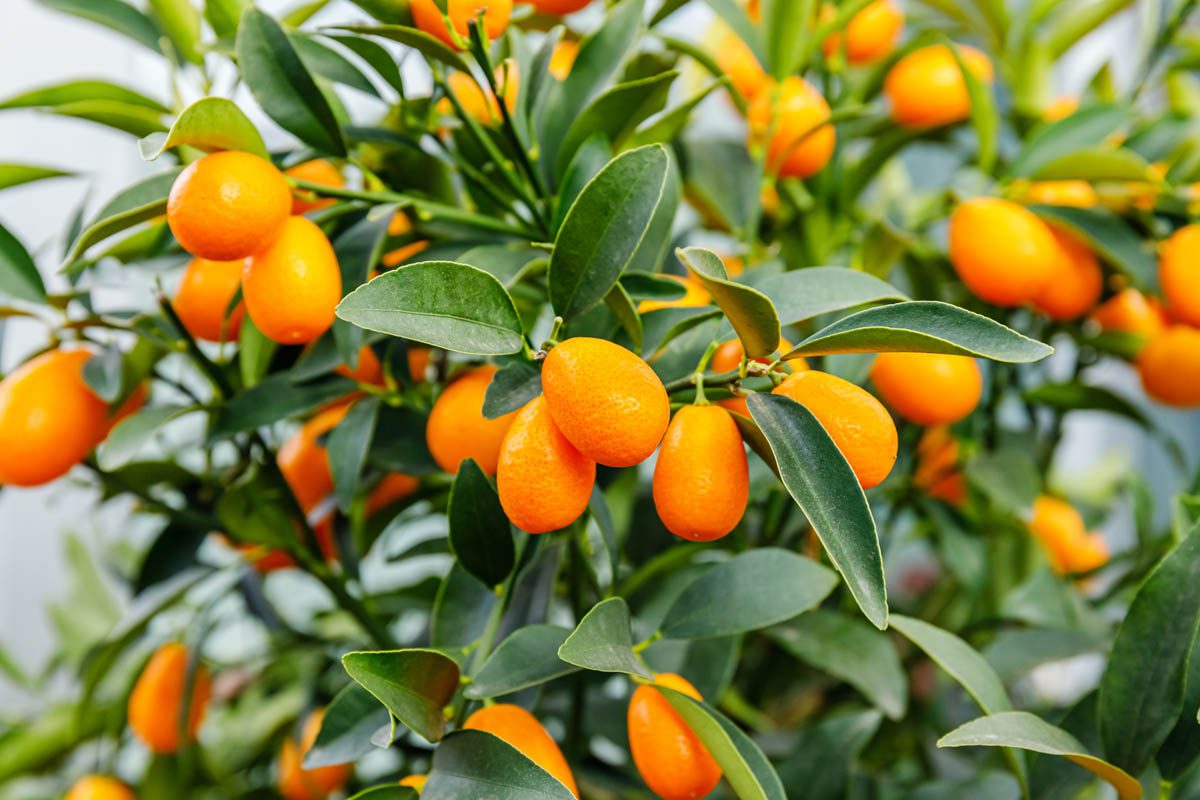
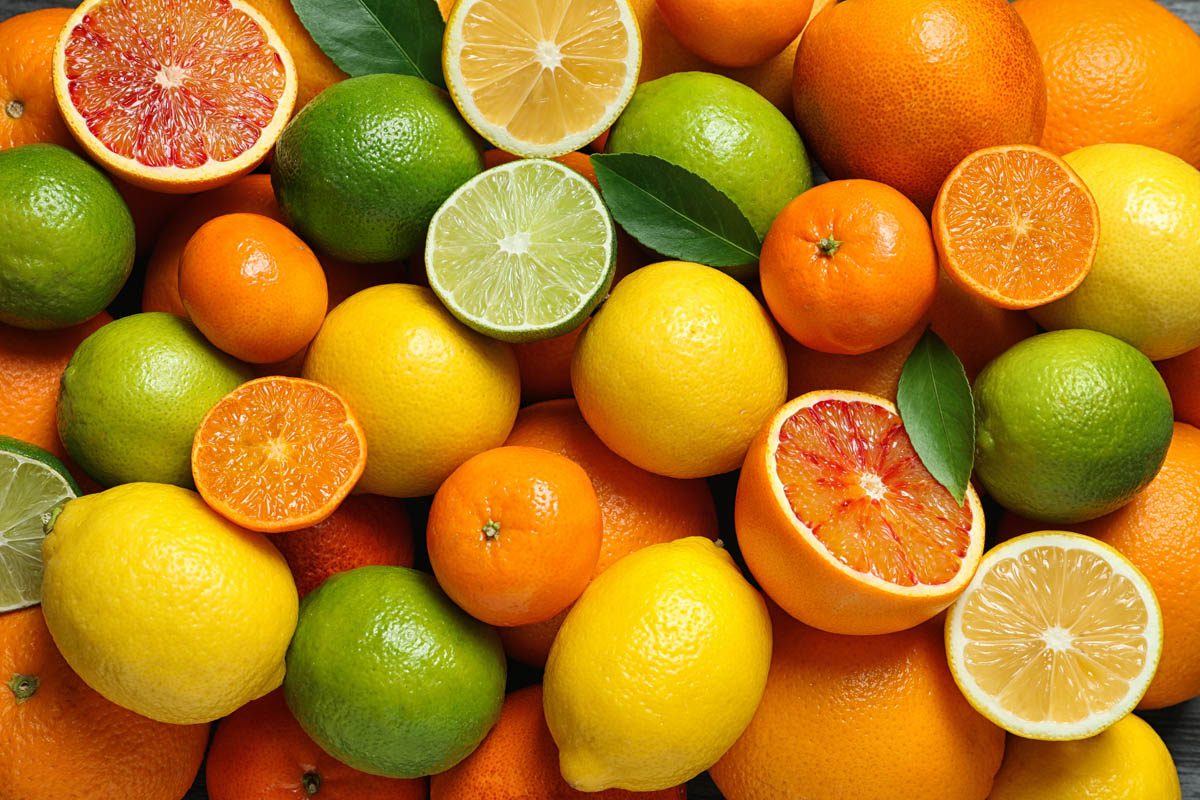
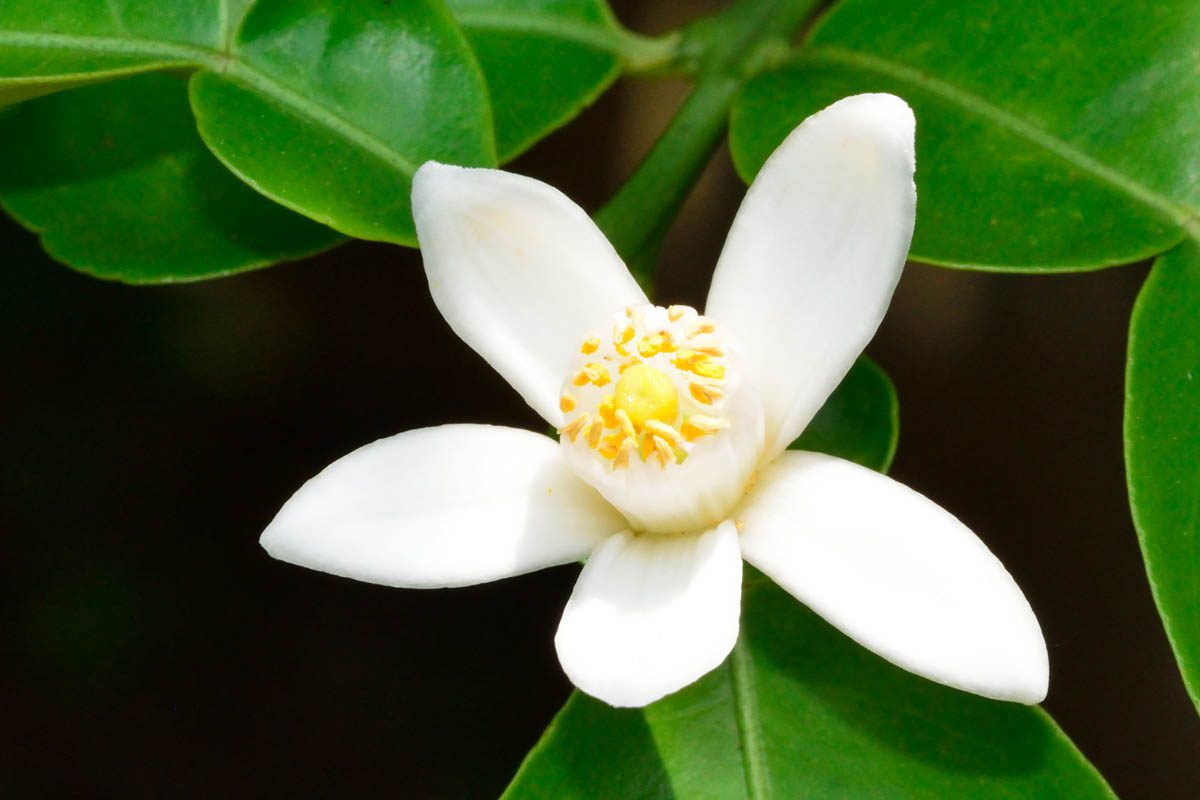
As an avid citrus grower with over twenty citrus trees in my garden, I have found citrus to be one of the easiest and most rewarding fruit trees to grow. Citrus is one of the most diverse species of fruiting tree, from the tart ‘acid citrus’ to the sweet and juicy oranges and dekopons. Not only does freshly picked citrus taste great, it also has ornamental value in the garden and the flowers produce a beautiful sweet scent.
The shape of the flower is ‘actinomorphic‘, which refers to its radially symmetrical shape. The peak blooming time is spring, but some types of citrus in temperate zones produce flowers and fruit year-round.
Most of us think of citrus as a Mediterranean fruit as it is widely cultivated there, however, it is not native to the region. Citrus originated in Asia. Bitter oranges (Citrus aurantium) were first brought to Europe by the Arabs, who had acquired them from Asia. They were probably introduced to Spain and Sicily sometime between the 10th and 12th centuries during the period of Arab rule.
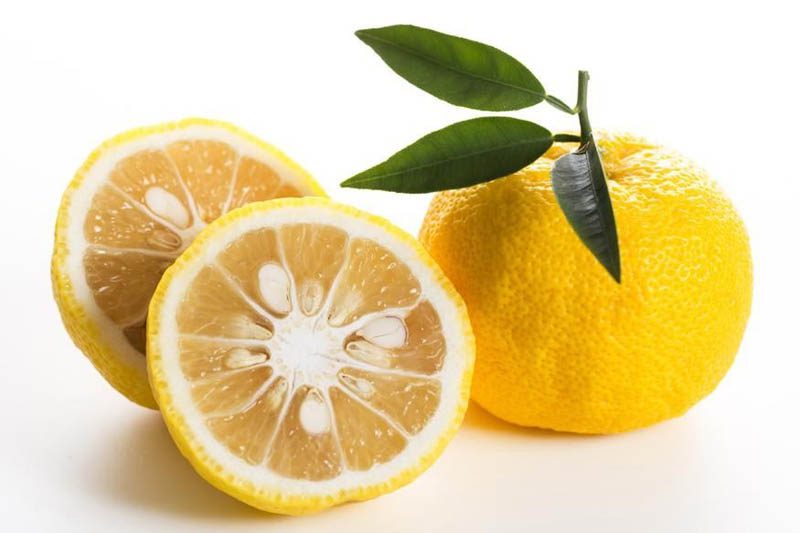
Sweet oranges (Citrus × sinensis) are the most abundant citrus fruit in the world, and make up approximately 40% of all imports. Oranges are widely consumed raw, or juiced. China, Brazil, and the United States are the top producers of sweet oranges. dIn Japan, the yuzu (Citrus junos Sieb. ex Tanaka) and sudachi (Citrus sudachi Hort. ex Shirai) are popular varieties of citrus but are not widely cultivated in the Western world.
What type of fruit is citrus?
Citrus fruits are classed as hesperidium. Hesperidium is a type of modified berry that is made up of a tough, leathery rind, which protects the delicate pulp inside.
The outside of a citrus fruit consists of a thick, aromatic rind (exocarp and mesocarp), commonly known as the zest and peel. Beneath the rind is a white pith (albedo), and below that, the juicy segments (endocarp) which contain the seeds. The segments are filled with juice vesicles, which are specialised hair cells.
One of the distinctive features of hesperidium is its way of storing citric acid, which is stored in vacuoles of the juice vesicles, giving the fruit its characteristic tart flavour.
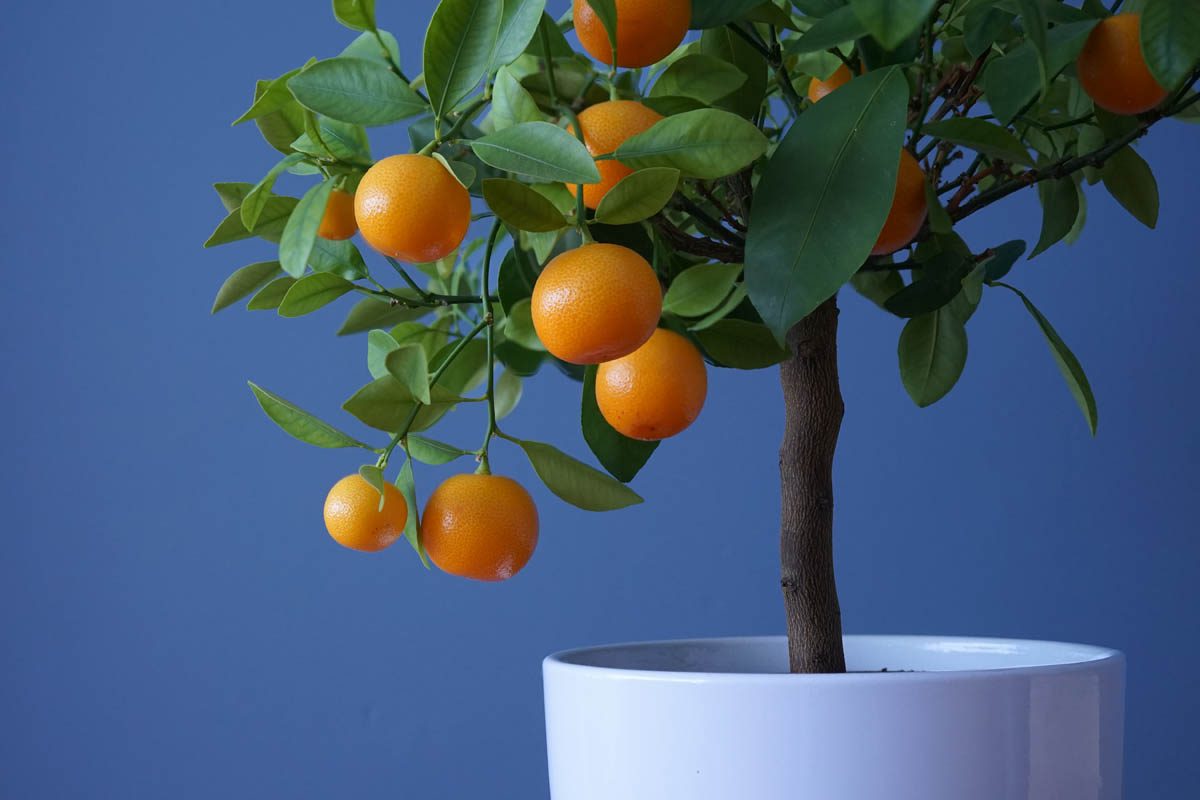
Dwarf vs full size
Dwarf citrus trees are great for decks, patios or small gardens. They typically grow to a height of 1.5 metres (5 foot), which makes it easy to harvest the fruit. The volume of fruit on dwarf citrus is generally the same as the full-sized counterpart.
Rootstock is responsible for the ultimate size of the tree. Dwarf trees are grafted onto rootstock to encourage dwarf growth habits. One of the most common dwarf rootstocks is a mutation of Citrus trifoliata, known as C. Trifoliata ‘Flying dragon’. This deciduous citrus relative is popular due to its hardiness and ability to induce dwarfing in the grafted tree.
Dwarf trees are easier to manage than their full-size counterparts and are more suitable for small gardens or container gardening. Full-size trees have a longer lifespan (50 years vs 25 years) and produce a higher fruit yield.
Both full-size and dwarf citrus are suitable for pots. As the pot will restrict root growth, a full-sized citrus will not grow as tall as it would in the ground.
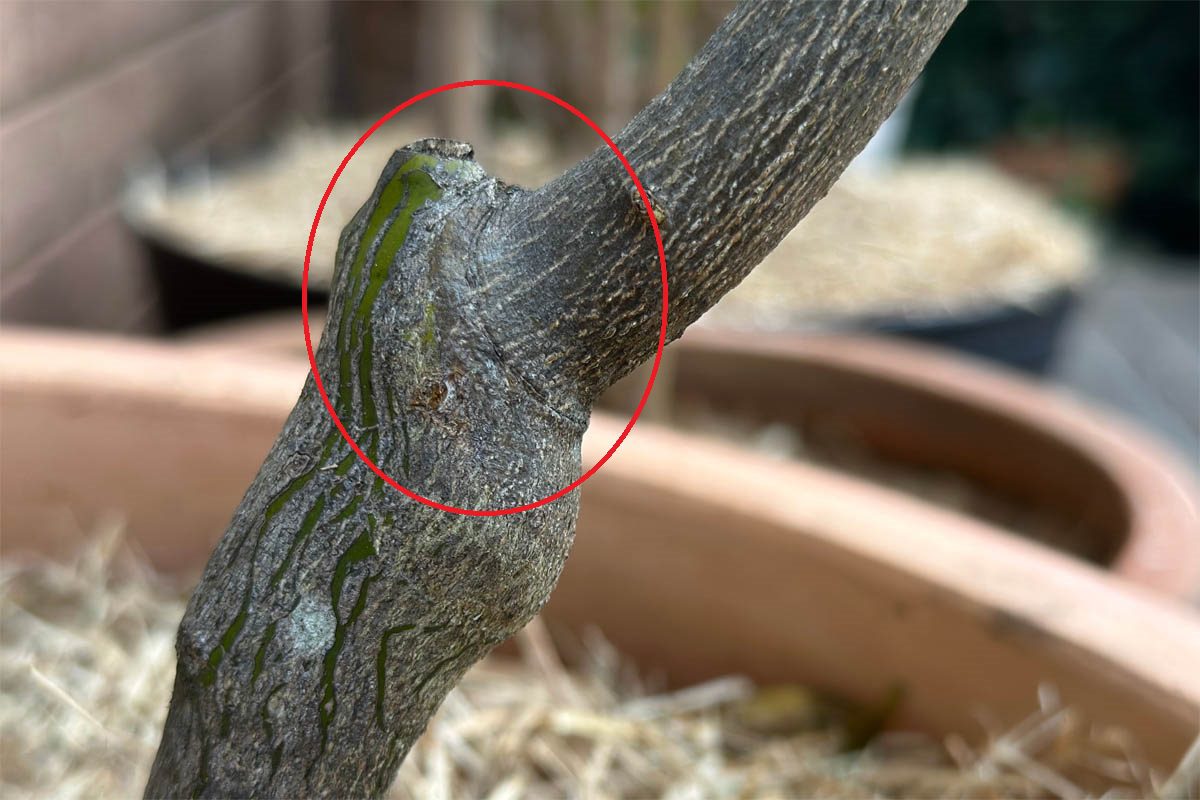
Why are citrus trees grafted onto rootstock?
Grafting involves combining a rootstock with a scion. The scion is a cutting from a citrus tree with desirable traits, with the rootstock, which is a young tree with a robust root system, disease resistant and hardy to certain temperatures. The scion is secured to the rootstock so that their cambium layers align. This allows the scion to inherit the favourable traits of the rootstock, and ensure the citrus only produces the desired fruit.
Quick propagation of desired variety: Grafting allows for the reproduction of the exact genetic copy of a desired citrus variety, ensuring that the fruit’s quality and characteristics are preserved. Growing trees from seed is slower, and as many citrus trees are hybrids, there is no guarantee the seedling will have the same characteristics as the parent plant.
Disease resistance: Many citrus rootstocks have been selected for their resistance to certain pests and diseases, such as citrus tristeza virus, phytophthora root rot, and root nematodes. Grafting onto these rootstocks can help protect the scion (the upper part of the graft that will become the fruiting part of the tree) from these threats.
Improved tolerance to soil and climate conditions: Some rootstocks are more tolerant of certain soil types, pH levels, salinity, or climatic conditions than others. Choosing the appropriate rootstock can improve the success and productivity of the tree, even when grown in less-than-ideal conditions, such as areas with frost.
Control of tree size: Rootstocks influence the size of the mature tree, resulting in dwarf varieties that are easier to harvest and suitable for small areas.
Tree longevity: Some rootstocks can enhance the lifespan of the citrus tree, resulting in more productive years.
Common citrus rootstocks
Citrange (Citrus sinesis x Poncirus trifoliata) a hybrid that performs well in clay loams. Popular cultivars include ‘Troyer’ and ‘Carrizo’. Sweet orange (Citrus sinensis) grows well in sandy to medium loam soils but is less tolerant of heavy, wet soils, nematodes and root rot. Other pros include good fruit quality and vigorous growth.
Hardy orange (Poncirus trifoliata) is valued for its cold hardiness, resistance to various diseases including citrus tristeza virus and nematodes, and its ability to adapt to a variety of soil conditions. Poncirus trifoliata ‘Flying dragon’ provides the advantages of standard trifoliate orange rootstock, such as cold hardiness and disease resistance, while also inducing dwarfing in the scion, which makes it ideal for smaller spaces or container growing.
Sour orange (Citrus aurantium) is only suitable for lemons and limes. This rootstock produces high-quality fruit, thrives in a wide range of soils and has tolerance to root fungi, nematodes, and cold.
Are multi grafted trees recommended?
Also known as fruit salad trees, multi-grafted trees contain more than one species of citrus. For example, you may have lemon and lime, or grapefruit and orange. You cannot have different genera, such as an apple and an orange grafted tree.
The idea of multi-grafted sounds great, especially if space is an issue. You will often find that one of the grafts will take over the whole tree. I’ve had two grafted citrus, one was orange, lemon and grapefruit, and the other was lemon and lime. The orange, lemon and grapefruit became an orange tree, and the lemon and lime is almost all lime, with one small branch that gives me 1 – 3 lemons a year. The lime portion produces around 100 times a year.
Pot vs ground
Both dwarf and full-size citrus trees are suitable to grow in the ground or in large pots. People renting may choose to grow citrus in a pot so they can take it with them when they move. Potted citrus is also great for small gardens or decks. Some varieties of citrus such as kumquat and calamondin have ornamental value. I have three potted calamondins on my deck purely for their visual appeal. Calamondin isn’t a fruit I would normally eat (I will probably try my hand at a calamondincello this year), however, they make great ornamental citrus because they flower and fruit almost year around.
Bear in mind that fruit yield will be greatly reduced if the tree is grown in a pot. A mature citrus can produce up to 200 fruits in a season, compared to a pot-grown one which will only produce twenty. The productivity of a lemon tree is also influenced by factors such as proper pruning, adequate sunlight, appropriate fertilisation, sufficient water, and disease control. Providing optimal care and maintaining the tree’s health can help maximise its fruit production.
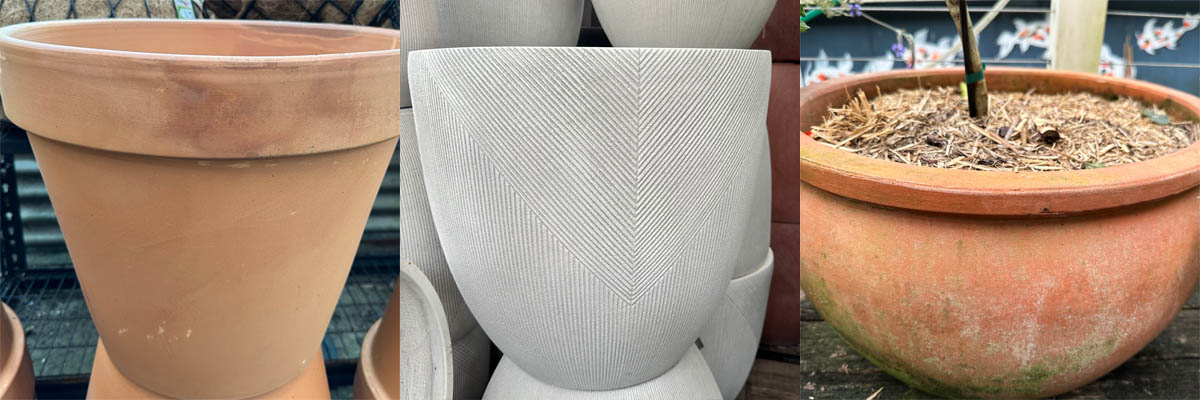
What is the best pot to grow citrus in?
The pot should be at least 40 cm (16 inches) in diameter and ideally as wide at the top as it is at the bottom. Egg-shaped or standard pots are ideal for your citrus. My preference is egg-shaped pots as they are more stable than traditional pots that tend to be much narrower at the bottom. Potted, citrus trees, especially when laden with large fruit such as grapefruits or oranges can be top-heavy and prone to toppling over in pots that are too narrow at the bottom.
Terracotta not only looks great, but the porous nature of terracotta can help to regulate moisture levels in the soil. The pot can absorb excess water when the soil is too wet and then slowly release it back into the soil as it dries out.
The terracotta pot on the left is fine for citrus as long as the tree is not too top-heavy. The egg pot in the middle is ideal and holds larger citrus well due to its overall more stable shape. The terracotta pot on the right tapers in at the top, which can make the removal of the plant more difficult when repotting.
When is the best time to plant citrus?
Spring is the best time to plant your citrus tree as the soil is warming up. This gives the tree a full growing season to establish itself before the colder weather sets in. If you’re growing the tree in a pot indoors or in a greenhouse, the planting time isn’t as critical, but again, spring is often the best choice.
Are citrus self-pollinating?
Almost all varieties are self-pollinating (also known as self-fruitful). A self-pollinating citrus can produce fruit without the need for another citrus to cross-pollinate. Citrus trees can also cross-pollinate with other citrus varieties, resulting in hybrid varieties. The fruit will remain the same, but the seeds within the fruit will be hybrid.
Even self-pollinating trees can benefit from cross-pollination, which can help to increase fruit set and yield. Gardeners may choose to cross-pollinate by hand or attract pollinators to the garden by growing a variety of flowers.
Bees and other pollinators play a crucial role in both self-pollination and cross-pollination by transferring pollen from the male parts of the flower to the female parts. Thus, while citrus trees don’t need another tree to bear fruit, they often do need pollinators.
How to choose a citrus tree
Look for healthy trees with fresh, mature green leaves and no evidence of damage to the leaves or stem. Fruit on a citrus tree is not an advantage, as it should be removed for the first 2-3 years to allow the citrus to put its energy into growth and not fruit production.
How to care for a citrus tree
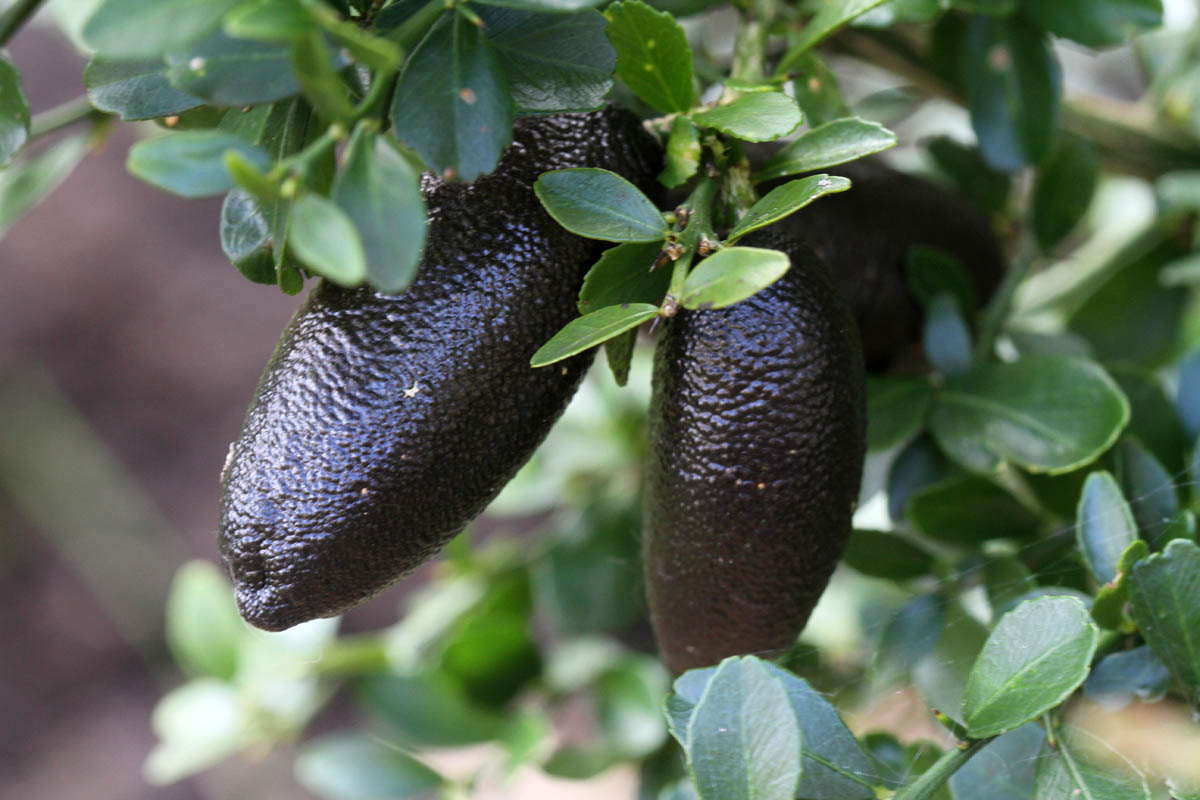
As an avid fruit grower, I find citrus one of the easiest and most rewarding fruits to grow. I personally love the more tart varieties such as lemon, lime, grapefruit and finger lime.
Soil
Citrus trees grow best in soil that is aerated, well-drained, and sandy loams. If growing in the ground, clear the site of plants and plant roots as the citrus root system is concentrated in the top 30-50 cm of soil and it doesn’t like competition around the root ball.
Well-drained and aerated soil is vital for citrus trees to avoid root rot. Citrus trees do not grow well in heavy clay soils unless aeration, drainage or mounding is provided.
Optimal pH range
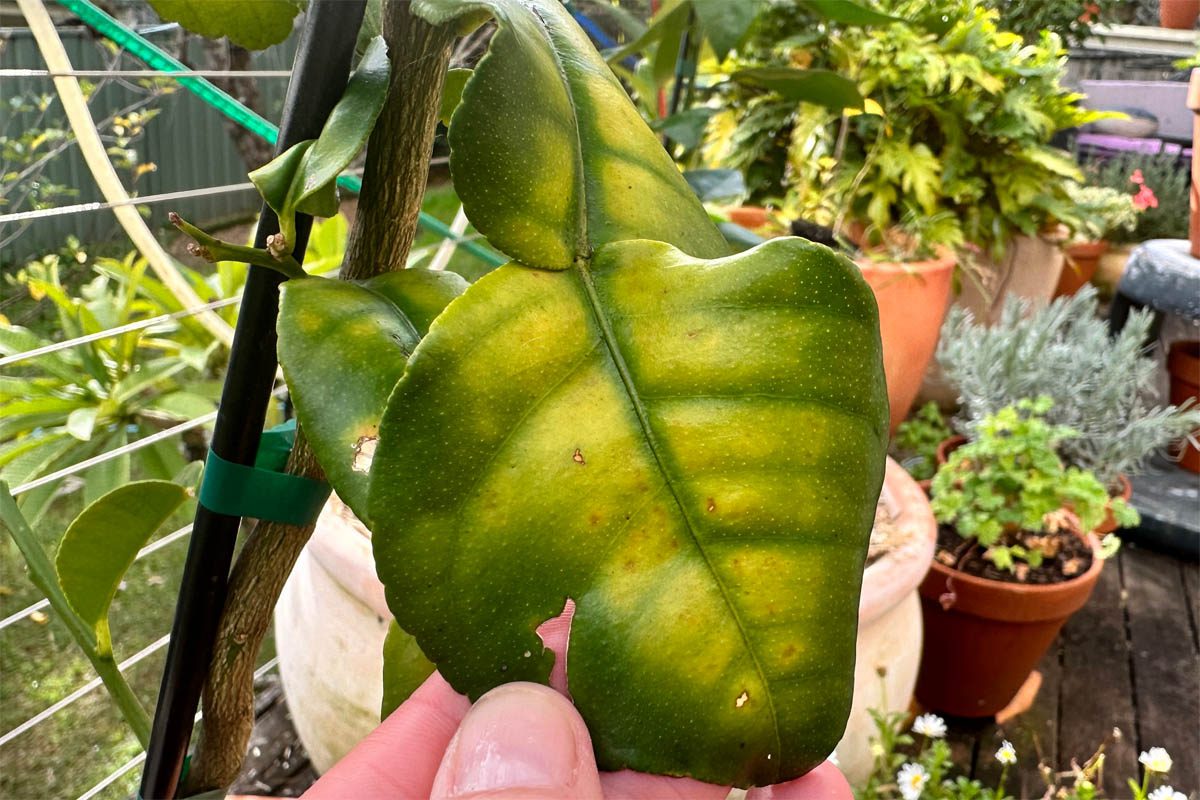
Citrus prefers slightly acidic to neutral pH between 6.0 and 7.5. Within this range, citrus trees can efficiently absorb essential nutrients from the soil. Soil that is too acidic (below 6.0) can result in nutrient deficiencies as acidic soil hinders the availability of essential nutrients such as phosphorus, calcium, and magnesium, leading to stunted growth and yellowing leaves. Soil pH that is too high, (above 7) can result in citrus trees that struggle to absorb zinc, iron and manganese, which can cause yellowing leaves with green veins.
Testing soil pH test is important to determine the pH level of the soil to ensure that the soil provides optimal conditions for their growth, nutrient uptake, and overall health.. Soil testing kits are readily available at garden centres or online. A pH kit will provide you with accurate information on your soil’s pH which will enable you to make adjustments. To lower alkaline soil, add sulfur, peat moss, or organic matter with high acidity. To raise the pH in acidic soil, apply lime or other alkaline materials.
Soil type
Citrus trees thrive in loamy or sandy loam soil, which provides a balance between good drainage and water retention. Avoid heavy clay soils that can hold excess moisture and lead to root rot. Incorporating organic matter into the soil improves its structure, drainage, and nutrient-holding capacity. Compost, well-rotted manure, or leaf mould can be added to enrich the soil before planting citrus trees.
Adequate drainage is crucial for citrus trees. Excessive moisture can lead to root rot as the soil becomes compacted, removing air pockets that are critical for the roots to obtain enough oxygen. If your soil has poor drainage, amend it with organic matter or create raised beds to improve drainage.
Nutrients
Citrus trees require a good balance of essential nutrients for healthy growth and fruit production. Conduct a soil test to determine nutrient deficiencies and amend the soil accordingly.
Nutrient
Functions
Deficiency Symptoms
Excess Symptoms
Nitrogen (N)
Nitrogen is crucial
macronutrient necessary for the manufacturing of amino acids, the building blocks of proteins that are necessary for the development of
cellular structures and plant enzymes that facilitate biochemical reactions. It also plays a significant role in chlorophyll production
that enables plants to convert sunlight into energy via photosynthesis. As part of the DNA and RNA structures, nitrogen is essential for cell
division and growth, influencing the overall growth rate of the plant,
leaf development, and seed and fruit production.
Yellowing or pale green
leaves (chlorosis), and stunted growth.
Excessive vegetative
growth at the expense of flowering and fruiting. May also make thick fruit rinds, delayed maturity of fruit and lowered juice content.
Phosphorus (P)
Phosphorous is a vital part of the ATP (adenosine triphosphate) molecule, which provides energy for many processes in the plant, including growth and reproduction. It is also
necessary for the formation of DNA and RNA, which carry genetic information for new cell growth. Phosphorous contributes significantly to root development which enhances nutrient and water uptake and is also
involved in flowering and fruiting, and seed development.
Stunted growth, delayed maturity, reduced
yield, and dark, sometimes purple, foliage. Puffy fruit, bumpy rinds and
open centre cores.
Interferes with micronutrient uptake (iron,
zinc, manganese, leading to deficiencies of these nutrients.
Potassium (K)
Potassium is involved in water regulation within the plant cells, helping to control the opening and closing of stomata, which, in turn, affects water usage and photosynthesis. As a vital component in protein and carbohydrate synthesis, potassium is essential for overall plant growth, development, and health. It is also key to the activation of many enzymes, strengthening plant cell walls and contributing to stronger, more disease-resistant plants. Potassium aids in the translocation of sugars, effectively distributing energy throughout the plant, which is particularly important for fruit and seed development.
Older leaves turn yellow
at the edges and between veins, weak stems.
High potassium can
interfere with the uptake of other nutrients such as calcium, magnesium,
and nitrogen.
Magnesium (Mg)
Central atom in chlorophyll, essential for photosynthesis. magnesium activates many of the enzymes involved in cell
growth and reproduction, contributing to the successful progression of
seed development. Magnesium is also essential for the creation of
adenosine triphosphate (ATP), the main energy carrier in all living
organisms, necessary for the energy-intensive process of seed formation
and maturation.
Intervenal yellowing (yellowing of leaves between veins), beginning with older leaves.
Rare, but may lead to calcium deficiency.
Zinc (Zn)
Zinc is a crucial micronutrient in plants, that is a vital
component in many enzymes and proteins and is involved in
the synthesis of auxins, a type of plant hormone
instrumental in regulating growth. It aids in the formation
of chlorophyll and some carbohydrates, and assists in starch
formation and protein synthesis, all of which contribute to
the overall growth and development of the plant.
Stunted growth, reduced
leaf size, and interveinal chlorosis, a condition where leaf tissue turns yellow while the veins remain green. In severe cases, deficiency
can also lead to necrotic spots or distorted leaves.
Excess is rare but can be
toxic to plants, potentially inhibiting plant growth and development,
and causing leaf discolouration, root damage, and reduced crop yield.
Manganese (Mn)
A vital micronutrient for plants, that is a
necessary cofactor in enzymes involved in photosynthesis, respiration,
and nitrogen metabolism. Manganese aids in the formation of chloroplasts
and is crucial for the process of photosynthesis, facilitating the
conversion of light energy into chemical energy.
Interveinal chlorosis in younger leaves and
necrotic spots.
Leaf discolouration or necrosis, root
damage, and inhibited growth. In alkaline soils, manganese may become
unavailable to plants, causing deficiency symptoms even when manganese
levels are adequate.
Iron (Fe)
Iron is a component of
many proteins and enzymes involved in photosynthesis, respiration, and
nitrogen fixation. It is a key constituent of proteins involved in electron transport, facilitating energy production and is also integral to chlorophyll synthesis, although it’s not part of the chlorophyll
molecule itself.
Yellowing between the
leaf veins while the veins themselves remain green, most noticeably in
young leaves. This occurs because iron is necessary for the formation of
chlorophyll, which gives leaves their green colour.
Seldom identified but can
cause bronzing or tiny brown spots on leaves, ultimately inhibiting
plant growth.
A commonly recommended ratio for citrus trees is 2:1:1 or 3:1:1 of N:P:K. So, for example, a citrus fertiliser might have an N:P:K ratio of 6-3-3 or 9-3-3.
Blood and bone contain nitrogen and phosphorous, to make it complete, add a quarter of a cup of sulphate of potash per kilo of blood and bone. Add fertiliser to moist soil in a band around the tree, starting at the drip line (outer edge of the tree), and work inwards, halfway towards the trunk. Rake, mulch, and water immediately afterwards.
Soil moisture:
Citrus trees require consistent moisture, but the soil should never be waterlogged. The goal is to keep the soil evenly moist. A deep watering every 7 to 10 days (depending on the weather and soil type) is typically sufficient for mature trees, while younger trees usually require more frequent watering. It’s important to water deeply to encourage the development of a robust root system that can access water lower in the soil.
Overwatering can lead to root rot. When the soil is waterlogged, the spaces between soil particles become filled with water, starving the roots of oxygen. Overwatering can also promote the growth of various fungi and bacteria that cause root rot. These pathogens are present in the soil in small quantities without causing problems. However, in the anaerobic (low-oxygen) conditions created by overwatering, they can multiply rapidly and start attacking the weakened roots.
Water
Although citrus are somewhat drought-tolerant, they prefer a consistent water supply to thrive. Water deeply and thoroughly, to ensure the water reaches the deeper roots. Deep watering encourages a robust root system, critical for the overall health and stability of the tree. Water in-ground citrus once a week, or twice a week for potted citrus during the drier months and less often in autumn and winter.
Sunlight
Citrus trees grow best in an open position where they receive a minimum of five hours of full sun each day during the growing season. Sun is necessary for growth as well as the accumulation of sugars in the fruit.
Harvesting citrus
Harvest your citrus when it has reached its colour. Most citrus fruits are ready to harvest from winter to spring, and they should easily be removed from the tree when it is ready. Fruit left on the tree for too long will eventually lose its flavour and become dry.
Citrus can be eaten fresh or stored for up to two weeks. Most people will find their citrus tree grows more fruit than the average household can use. Uneaten citrus can be processed into juice, marmalades, cordial, lemon butter, candied, or liqueurs, or shared with friends and neighbours. We share our limes with our neighbours, and they give us their excess lemons as our lemon tree is still immature.
Citrus Fruit
Ideal
Storage Temperature
Storage Life
Orange (navel)
3-7°C (38-45°F)
2-3 weeks
Orange (Valencia)
3-7°C (38-45°F)
2-3 weeks
Lemon
10-15°C (50-59°F)
2-3 weeks
Lime
10-15°C (50-59°F)
2-3 weeks
Grapefruit
3-7°C (38-45°F)
2-3 weeks
Tangerine/Mandarin
3-7°C (38-45°F)
1-2 weeks
Pomelo
7-10°C (45-50°F)
2-3 weeks
Buddha’s hand
10-15°C (50-59°F)
1-2 weeks
Tangelo
3-7°C (38-45°F)
2-3 weeks
Yuzu
3-7°C (38-45°F)
2-3 weeks
Sudachi
3-7°C (38-45°F)
2-3 weeks
Finger Lime
3-7°C (38-45°F)
2-3 weeks
Kumquat
3-7°C (38-45°F)
2-3 weeks
Calamondin
3-7°C (38-45°F)
2-3 weeks
Refrigeration can extend the shelf life of most citrus fruits, however, the best flavour is when the fruit is fresh. The storage life will depend on how ripe the fruit is when it is picked or purchased and how it is stored. Check your fruit regularly for any signs of spoilage.
Pests and diseases
Pest/Disease
Symptoms
Treatment
African citrus psyllid (Trioza
erytrea)
African citrus psyllid causes direct
damage to the plant and can transmit the lethal Huanglongbing (yellow dragon
disease, previously known as citrus greening disease).
Contact your local government
authority if you suspect your citrus has African citrus psyllid.
Asian citrus psyllid (Diaphorina citri)
Mottled leaves, stunted growth, yellowing, and leaf
drop.
Contact your local government authority if you suspect
your citrus has Asian citrus psyllid
Citrus fruit borer (Citripestis
sagittiferella)
Holes and cracks in the fruit skin,
fruit drop, and frass (insect feces) around the holes.
Contact your local government
authority if you suspect your citrus has citrus fruit borer
Citrus leafminer (Phyllocnistis citrella)
Curled or distorted leaves with silvery trails
Use a specific leafminer trap or pheromones
Citrus mealybug (Planococcus citri)
Chlorosis (yellowing) of the foliage,
as well as leaf drop, stunted growth and reduced crop yields
Maintain beneficial insects such as
the mealybug ladybird (Cryptolaemus montrouzieri), lacewing
larvae (Oligochrysa lutea) and parasitic wasp, Leptomastix
dactylopii. Keep ant populations down as they feed on the
sugar-rich honeydew and in return protect citrus mealybug. Mealybugs can be difficult to control with chemicals due to their resistance, waxy coating and their natural tendency to hide.
Citrus canker (Xanthomonas axonopodis pv. citri)
Water-soaked, corky lesions on the underside of leaves,
later becoming more raised and defined with a crater-like centre,
encircled by a yellow halo. The disease manifests similarly on fruits
and stems, presenting raised crater-like, corky lesions. Infected fruit
may fall prematurely, and if lesions girdle the stem, branches may
experience dieback. Left unchecked, can spread rapidly, significantly
diminishing fruit yield and quality.
Prune and destroy affected parts; copper sprays
Citrus tristeza virus (Citrus
tristeza virus)
CTV causes a disease known as quick
decline, where infected trees rapidly wilt and die, often within a few
years of showing initial symptoms. In other cases, CTV can cause stem
pitting, where the bark of the tree develops elongated pits or grooves.
Affected trees exhibit stunted growth, reduced fruit yield, and lower
fruit quality. The fruit from infected trees may be smaller and display
colour inversion, with the area closer to the stem remaining green while
the end furthest from the stem becomes fully coloured. CTV can also
cause seedling yellows in which young trees remain stunted and show
yellowing of the leaves.
No cure; use resistant rootstocks;
remove infected trees
Queensland fruit fly (Bactrocera tryoni)
Fruit damage, decreased crop yield, decreased fruit
quality
Monitoring (using fruit fly traps), sanitation (removing
and disposing of infested or fallen fruit), the use of protein and
insecticide baits, and in some cases, the use of male annihilation
techniques or sterile insect technique (SIT).
Red scale (Aonidiella aurantii)
Yellowing and wilting of leaves,
reduced vigour, and potential death of branches or entire trees if left
unchecked. The feeding activity can also cause fruit to drop prematurely
and result in a significant decrease in fruit quality, marked by
yellowish, red, or brown spots on the rind where the scales were
attached
Parasitic wasps (Aphytis
lignanensis and Aphytis melinus), ladybirds, chilocorus beetles and
predatory mites. Parasitic wasps are commercially available. Sticky
traps with synthetic red scale pheromones can be used to monitor for the
presence of flying red scale. Movento is an insecticide produced by
Bayer that is effective against red scale.
Root rot (Phytophthora spp.)
Brown or black roots become soft or rotted, in contrast to healthy roots which are firm and white. Above-groundsymptoms may initially be less evident but can include leaf chlorosis
(yellowing), wilting, and overall tree decline. As the disease
progresses, the canopy may thin and the tree may exhibit stunted growth.
Fruit production can be significantly reduced, and the fruit itself may
be smaller than normal. In severe cases, root rot can cause tree death.
Good water management, fungicides if necessary. Can be hard to treat once the roots are damaged.
Yellow dragon disease (Liberibacter
spp.)
Yellowing of the leaves in an
asymmetrical pattern, where one half or section of the leaf appears
blotchy yellow while the other part remains green. Stunted growth,
smaller, misshapen fruit that remains green at maturity, and has a
bitter, off-flavour. Fruit and flower drop increase, leading to reduced
yield. Additionally, the disease often leads to twig dieback, and in
severe cases, it can result in the death of the entire tree. The
symptoms may appear on a single branch at first and then spread to the
entire tree.
No known cure, prevention is key;
remove and destroy affected trees
Cold hardy varieties
Yuzu citrus
Satsuma mandarin (Citrus unshiu): Satsuma mandarins are among the most cold hardy of citrus trees, withstanding temperatures as low as -7°C (20°F). They are known for their sweet, seedless fruit and generally ripen earlier than other mandarins.
Kumquat (Fortunella spp.): Kumquats are very cold hardy, withstanding temperatures down to -7°C (20°F). They produce small, round or oblong fruit that can be eaten whole, including the skin, which is sweet and contrasts with the tart inner flesh.
Yuzu (Citrus ichangensis x C. reticulata): Yuzu is a unique citrus used primarily for its aromatic zest and juice in Japanese and Korean cuisine. It can withstand temperatures down to -7°C (20°F). The fruit is typically not eaten fresh due to its large seeds and minimal flesh, but the zest and juice are highly prized.
Trifoliate orange (Poncirus trifoliata): While not a true citrus, trifoliate orange is often grouped with them because of its similar characteristics. It’s incredibly cold hardy, surviving temperatures down to -10 degrees Fahrenheit. The fruit is generally considered inedible due to its bitterness, but it is sometimes used to make marmalade. Trifoliate orange is often used as a rootstock for other citrus to impart its cold hardiness.
Calamondin (Citrus x citrofortunella microcarpa): Calamondin is cold hardy down to -7°C (20°F). The fruit looks like a small tangerine and can be used as a tart substitute for lemons or limes.
Improved Meyer lemon (Citrus x meyeri ‘Improved’): This is a hybrid citrus fruit native to China. It is a cross between a citron and a mandarin/pomelo hybrid distinct from both parents. The Improved Meyer lemon can handle temperatures down to around -7°C (20°F). Meyer fruit is sweeter and less acidic than common lemons.
Keep in mind that even these more cold hardy varieties can benefit from protection if extreme cold temperatures are forecasted. Wrapping the tree, using frost blankets, or employing outdoor lights can help prevent damage. Also, microclimates, such as those provided by south-facing walls, can help increase the cold hardiness of citrus trees in the landscape.
USDA hardiness zones of citrus varieties
The USDA hardiness zone is a resource developed by the United States Department of Agriculture (USDA) to help growers determine which plants are most likely to thrive in a particular location. The map is divided into zones based on the average annual minimum winter temperature.
Citrus fruit
Ideal
climate
Orange (Sweet)
Tropical and Subtropical, USDA zones 9-11
Orange (Bitter/Seville)
Tropical and Subtropical, USDA zones 9-11
Grapefruit
Tropical and Subtropical, USDA zones 9-10
Lemon
Mediterranean, Subtropical, USDA zones 8-11
Lime
Tropical and Subtropical, USDA zones 8-11
Tangerine (Mandarin)
Tropical and Subtropical, USDA zones 8-11
Kumquat
Tropical, Subtropical, and Temperate, USDA zones
9-10
Buddha’s hand
Tropical and Subtropical, USDA zones 9-11
Tangelo
Tropical and Subtropical, USDA zones 9-11
Yuzu
Cooler regions of Temperate, USDA zones 8-10
Sudachi
Tropical and Subtropical, USDA zones 8-11
Finger Lime
Tropical and Subtropical, USDA zones 8-11
Calamondin
Tropical and Subtropical, USDA zones 8-11
Makrut (kaffir lime)
Tropical and Subtropical, USDA zones 10-12
Etrog (Citron)
Mediterranean, USDA zones 9-10
Pomelo
Tropical and Subtropical, USDA zones 9-11
How long do citrus trees live?
Citrus lifespan can vary depending on the species, the conditions it is grown in and how well it is cared for. Under ideal conditions, many citrus trees can live for 40-50 years. Mother Orange Tree is a citrus that was purchased in 1856 and still bears fruit.
The lifespan of a citrus tree can vary significantly depending on the specific variety, the conditions it’s grown in, and how well it’s cared for. However, under optimal conditions, many citrus trees can live for over a century.
The productive lifespan of commercial citrus tends to be 20-30 years, after which time, yield declines and the tree is less economically viable.
With proper care, you can expand the longevity of your citrus and ensure maximum yield. Grow a variety that is suited to your climate, fertilise regularly, prune away dead or diseased branches and maintain shape to allow for good airflow, and routinely check for pests and diseases.
How long does it take citrus trees take to reach maturity?
Most citrus trees are approximately 1 metre tall when they are sold. It takes up to ten years for citrus to reach maturity. Removing fruit from young citrus trees allows the tree to direct its energy toward establishing a strong root system and growing in size, which can lead to better overall health and greater fruit production in the long term.
Which variety should I grow?
This depends on your local conditions and personal preferences. If you live in a cool area, look for frost-hardy varieties. I have been growing citrus trees for twenty years, and have learned a lot along the way. These days I am more mindful of what I am planting, why, and if I will actually use the fruit. Also, factor in how much fruit you will use or give away. For example, I have two lemon trees (admittedly, they are different varieties). A fully mature lemon tree can produce over 200 lemons a season. Can you use or give away 400 lemons? For most people, one tree per citrus type is enough.
Fruit availability
Another point to consider is the availability of citrus in supermarkets or fruit shops. Oranges are readily available year-round and are cheap. My preference is to grow citrus that is more expensive, or rare varieties such as sudachi or yuzu that aren’t available in Australian supermarkets.
We grow yuzu, sudachi, makrut lime, Australian finger lime, Buddha’s hand, pomelo and tangelo, which are rarely, if ever available to buy from supermarkets or fruit shops in Australia. In addition to the difficult-to-buy varieties, we also grow calamondin and kumquat as ornamentals, the fruit is a bonus. Common citrus varieties include lemon and lime, to make limoncello and limecello. There’s a 15-year-old dwarf mandarin I planted for my young daughter who loved mandarins. We don’t tend to use the fruit, so give it away. I would like to try mandarincello this year with some of the fruit. We also have two orange trees, which will likely be given away as we don’t eat the fruit.
Is it true that urinating on a citrus tree is good for it?
There is some truth to this as urine contains nitrogen, which is an essential macronutrient. However, the downside to this practice is that human urine also contains salt, which can build up in the soil over time and be harmful to plants. If it is done often enough, human urine can create an unpleasant odour around the tree. To be honest, I would prefer to use a balanced fertiliser than human urine.
What are the biggest and smallest types of citrus fruit?
The largest citrus fruit is the Pomelo (Citrus maxima). This fruit can reach of up to 30 cm (nearly 12 inches) in diameter and can weigh as much as 2 kg (about 4.4 pounds) or even more.
The smallest citrus fruit is generally accepted to be the kumquat (Fortunella species). The fruit is usually about the size of a large olive.
Julia is a writer and landscape consultant from Wollongong with a love of horticulture. She had been an avid gardener for over 30 years, collects rare variegated plants and is a home orchardist. Julia is passionate about learning and sharing her knowledge of plant propagation and plant toxicology. Whether it’s giving advice on landscape projects or sharing tips on growing, Julia enjoys helping people make their gardens flourish.
Also known as ‘translucent’ or ‘oil glands‘, pellucid dots are specialised glandular cavities that can be seen on the leaves, peels and fruit of certain plants, in particular the Rutaceae (citrus) family. They are visible as small translucent spots or lines on the leaves. Pellucid dots can be difficult to see with the naked eye, but a magnifying glass or torch shone behind the leaf can reveal them.
Pellucid dots are made up of special cells called idioblasts, which are different from the surrounding cells in size, shape, and content. Idioblasts are characterised by their ability to synthesise and store unique compounds, which can include oils, crystals, latex, resins, mucilage, and pigments.
In citrus plants, pellucid dots are packed with essential oils, which are responsible for the plant’s distinctive aroma. They are often visibly noticeable as tiny, clear or translucent dots on the leaf or peel surfaces. When the idioblasts are ruptured (for example, when you squeeze a lemon or lime), the volatile oils are released, producing the citrus scent we associate with these fruits.
The term “pellucid” comes from the Latin word “pellucidus“, which itself is derived from “per-” meaning “through” and “lucidus” meaning “clear or bright”. Thus, “pellucidus” can be translated to mean “very clear“.
What is the function of pellucid dots?
Fragrance: Perhaps the most recognisable function of these oil glands is the fragrance they impart to the plant. When the oils stored in these glands are released, they produce the characteristic aroma associated with the plant. In citrus plants, for instance, these oils give off the fresh, zesty scent we associate with fruits like oranges, lemons, and limes. The fragrance emitted from the essential oils within these glands can attract pollinators such as bees, butterflies, and other insects. This is crucial for the plant’s reproduction as it aids in the transfer of pollen from the male parts of a flower to the female parts, enabling fertilisation and the production of seeds.
Defence mechanisms: The essential oils can serve as a natural deterrent against herbivores and pests. The strong aromas, tastes, or even toxic or irritating effects of these oils can discourage animals from eating the plant, and can also repel certain pests.
Antimicrobial properties: The oils in these glands often have antimicrobial properties, protecting the plant against a variety of pathogens. This defence mechanism can reduce the plant’s risk of infection by bacteria, fungi, and other harmful microorganisms.
Competition for resources: Strong fragrances can also be a way to compete with other plants for resources. Some scents can inhibit the growth of surrounding plants, reducing competition for water and nutrients.
Thermoregulation: Emerging research suggests that these oil glands may also play a role in controlling leaf temperature, contributing to the plant’s overall thermoregulation and possibly aiding in its survival under different environmental conditions.
How do plants form pellucid dots?
Pellucid dots form during the early stages of leaf development. They arise from meristematic tissue, a type of plant tissue consisting of undifferentiated cells that are capable of dividing and developing into various types of specialised cells.
When a leaf is first forming, it starts out as a small group of cells. As these cells divide, they begin to differentiate into the various types of cells that make up the leaf. Some of these cells are destined to become the basic tissue of the leaf, while others are set to become specialised structures like veins, stomata, or pellucid dots. In the case of pellucid dots, certain cells in the developing leaf begin to divide more frequently than others. Cells that divide more frequently form a small cluster, set aside from the surrounding tissue. Following the instructions in the plant’s genetic code, these clusters of cells begin to differentiate into a unique structure – the precursor to the oil gland.
These precursor structures continue to develop as the leaf grows and fill with essential oils or other compounds, which are produced by the plant’s metabolic processes and transported to these cells. Over time, these structures mature into fully-formed oil glands that are visible on the surface of the leaf or fruit.
The formation and distribution of pellucid dots can be influenced by several factors, including plant genetics, environmental conditions, and even the stage of development of the plant tissue. These glands are formed early in leaf development and their formation is completed before the leaf reaches its full size.
What plant species have pellucid dots?
Pellucid dots or oil glands are present in several plant families.
Rutaceae: The family that includes citrus trees (lemons, oranges, limes) is probably the most well-known for having these oil-filled glands. However, other members of this family like rue (Ruta graveolens), mock orange (Philadelphus spp.), and Zanthoxylum spp. also possess these pellucid dots.
Myrtaceae: This family includes the eucalyptus, guava, and allspice. Many of these plants are aromatic and have oil glands.
Lamiaceae: Also known as the mint family, this group includes aromatic herbs like rosemary, sage, thyme, basil, and, of course, various types of mint. Many members of this family have oil glands in their leaves.
Asteraceae: This is the daisy family, which includes many aromatic plants, like yarrow and chamomile. Some members of this family have oil glands, but they might not be as obvious as in the families listed above.
Lauraceae: This is the family of the laurel tree and includes other trees like cinnamon and avocado. Some of these species have oil glands.
Cannabaceae: Cannabis plants, particularly Cannabis sativa, contain glandular trichomes which are akin to oil glands and are responsible for the production of cannabinoids and terpenes, providing the plant with its unique aroma and properties.
While these plants have pellucid dots or oil glands, they might not always be visible to the naked eye. In some cases, you might need a magnifying glass or microscope to see them. These glands can also differ significantly in terms of their content and the compounds they produce, depending on the specific plant species.
Conclusion
Pellucid dots act as microscopic factories in plants that produce and store essential oils.
These structures play a critical role in the defence mechanisms of plants. They deter pests and protect the plant against pathogens.
The fragrance from these essential oils, released by pellucid dots, attracts beneficial pollinators, assisting in the plant’s reproductive process.
These oils also facilitate communication between plants and provide a competitive advantage in their environment.
Apart from essential oils, pellucid dots store a variety of substances like mucilage, resins, and tannins, contributing to the plant’s survival strategies.
The presence of pellucid dots underscores the complexity of plant adaptations, highlighting the significance of even minute structures in ensuring plant resilience and survival.
Julia is a writer and landscape consultant from Wollongong with a love of horticulture. She had been an avid gardener for over 30 years, collects rare variegated plants and is a home orchardist. Julia is passionate about learning and sharing her knowledge of plant propagation and plant toxicology. Whether it’s giving advice on landscape projects or sharing tips on growing, Julia enjoys helping people make their gardens flourish.
Water hemlock and Queen Anne’s lace have a similar appearance, displaying delicate umbel flowers and lacy foliage, but while one is harmless, the other one can be deadly.
Julia is a writer and landscape consultant from Wollongong with a love of horticulture. She had been an avid gardener for over 30 years, collects rare variegated plants and is a home orchardist. Julia is passionate about learning and sharing her knowledge of plant propagation and plant toxicology. Whether it’s giving advice on landscape projects or sharing tips on growing, Julia enjoys helping people make their gardens flourish.
Plant classification involves the identification and categorisation of plants based on their physical and genetic characteristics. This system of classification, known as taxonomy, consists of several hierarchical categories or ranks, including Kingdom, Phylum, Class, Order, Family, Genus, and Species.
The plant family is a higher taxonomic rank than species. A family is a group of several related plants that share common characteristics and are classified under the same group. It includes multiple genera (plural of genus), and a genus may include multiple species. For instance, the Rosaceae family includes many different genera, such as Rosa (roses), Malus (apples), and Prunus (cherries, peaches, and plums), among others.
Species is the most basic unit of classification and represents a group of plants that have similar physical characteristics and can interbreed to produce fertile offspring. For example, within the Rosa genus, there are multiple species like Rosa canina (dog rose) and Rosa rubiginosa (sweet briar).
You may notice the letter L after the botanical name of some plants, for example, the red maple (Acer rubrum L.). This tells us that the plant was named by Carl Linnaeus, the Swedish botanist, physician, and zoologist who formalised binomial nomenclature, and is known as the “father of modern taxonomy“.
Flannel flower and carrots
Flannel flowers (Actinotus helianthi) and carrots (Daucus carota subsp. sativus) are both members of the family Apiaceae, commonly known as the carrot or parsley family. This diverse plant family comprises about 434 genera and nearly 3,700 species, with members found all over the world, indicating a broad ability to adapt to various climates and conditions. The Apiaceae family is characterised by its unique inflorescence structure known as an umbel—a flat-topped or rounded flower cluster in which the individual flower stalks arise from the same point, much like the ribs of an umbrella.
Flannel flowers are native to Australia and carrots originally hail from parts of Europe and southwestern Asia, they share key family traits that underline their common evolutionary lineage.
Carrots are root vegetables, usually orange in colour, known for their crisp texture when fresh, and a high content of beta-carotene, which is metabolized into vitamin A in humans.
Flannel flowers and carrots exhibit compound leaves, another shared characteristic within the family. The global distribution of Apiaceae is likely due to the ability of their seeds to disperse over long distances, perhaps carried by wind, water, or hitching a ride with animals. Over time, these plants have adapted to their specific environments, resulting in the diverse array of species we see today.
Other notable members of the Apiaceae family: Parsley, dill, celery, coriander, parsnip and caraway.
Both wisteria (Wisteria species) and peanuts (Arachis hypogaea) belong to the large and diverse Fabaceae family, also known as the legume, pea or bean family. This family comprises over 19,000 species spread across 750 genera and is one of the largest plant families in the world.
The Fabaceae family has a worldwide distribution, indicating a long evolutionary history that likely involved extensive dispersal and adaptation to various environments. Genetic studies have shown that the family’s divergence began in the early Cretaceous period, approximately 100 million years ago.
Wisteria is a genus of woody climbing vines native to the Eastern United States and to China, Korea, and Japan. They are popular for their cascading flower clusters, often in shades of blue and purple. Wisterias are a staple in many ornamental gardens due to their stunning display and strong, sweet fragrance.
The peanut plant is a leguminous crop known for its edible seeds, which grow in a unique manner by developing underground after the flowers are pollinated and the stalk bends down to bury them in the soil.
Other notable members of the Fabaceae family: Chickpea, lentil, clover and lupin.
Sweet potato and morning glory
Morning glory (Ipomoea spp.) and sweet potato (Ipomoea batatas) both belong to the Convolvulaceae family, which is also known as ‘bindweed or morning glory family‘.
Sweet potatoes are a dicotyledonous plant known for their tuberous roots, a rich source of vitamins and minerals, and one of the few plants in the Convolvulaceae family cultivated for their edible parts.
Morning glory is a genus of several hundred species that are known for their showy, trumpet-shaped flowers that typically bloom in the morning, hence the common name. Unchecked, morning glory can become extremely invasive under the right conditions.
Both the sweet potato and the morning glory have climbing or sprawling growth habits. Despite one being mainly cultivated for its aesthetic value and the other for its nutritional content, their shared family ties underline the diverse utility and adaptability of plants within the Convolvulaceae family.
Other notable members of the Convolvulaceae family: Moonflower, sweet potato and railway creeper.
Okra and hibiscus
Okra (Abelmoschus esculentus) and hibiscus (Hibiscus spp.) both belong to the Malvaceae family. This diverse plant family contains over 200 genera and 4000 species.
Hibiscus is grown for its large, showy flowers which occur in a range of colours.
Okra is primarily cultivated for its edible green pots.
The five-petaled flowers of okra and hibiscus have a unique, central column structure connecting the stamen and pistil. This shared morphological trait is a key identifier of the Malvaceae family. Okra and many species of hibiscus are native to warm, tropical regions and they both thrive under similar growing conditions.
Other notable members of the Malvaceae family: Cotton, cacao and hollyhock.
Sunflower and lettuce
Sunflowers (Helianthus annuus) and lettuce (Lactuca sativa) may seem quite different from each other, with the former being a tall plant known for its large, bright yellow flowers, and the latter being a short leafy vegetable. However, they are both members of the same plant family, Asteraceae, also known as the sunflower or composite family. This vast plant family includes more than 23,000 species, making it one of the largest plant families on Earth.
The Asteraceae family is characterised by its unique inflorescence, or flower arrangement, known as a head or capitulum. This head is composed of numerous small individual flowers, or florets, that give the appearance of a single large flower.
Sunflowers are grown for their bright yellow flowers and sunflower oil which is produced from the seeds. They can range in height from 30 cm to over 150 cm.
Lettuce is a popular salad vegetable with a mild flavour and crunchy texture, used in salads and wraps. Most of us won’t see the flowers of the lettuce because it is harvested before it goes to flower. Flowering (known as bolting) leads to bitter leaves.
Other notable members of the Asteraceae family: Dandelion, daisy, marigold, artichoke and thistle.
Olive and lilac
Lilac (Syringa vulgaris) and olive (Olea europaea) belong to the same plant family, Oleaceae. This diverse family, also known as the olive family, contains about 24 genera with about 700 species of flowering plants. The family is cosmopolitan in distribution, existing on all continents except Antarctica. Plants in the Oleaceae family exhibit a wide range of forms, including trees, shrubs, and climbers.
Olives are evergreen trees native to the Mediterranean region that are renowned for their fruit and oil which have a number of health benefits. The fruits (olives) consumed either green or purple are consumed in various forms such as Greek salad, antipasto and pizza.
Lilac is an ornamental plant grown for its highly scented lilac or white flowers which grow in racemes.
Other notable members of the Oleaceae family: Osmanthus, common jasmine and privet.
Mango and Virginia creeper
At first, the connection between the tropical mango tree (Mangifera indica) and the North American vine known as Virginia Creeper (Parthenocissus quinquefolia) might seem elusive. Both plants are part of the Sapindaceae family which encompasses about 135 genera and 1,600 species. This extensive family represents a wide array of plant forms and adaptations, spanning from the tropics to temperate regions.
The mango is a tropical fruit-bearing tree, widely cultivated for its juicy, sweet fruit. Originally native to South Asia, the mango tree is now grown in many tropical and subtropical regions worldwide due to its popular fruit and its decorative, glossy foliage.
Virginia creeper is a fast-growing deciduous vine, native to eastern and central North America. Green leaves appear in spring after a winter dormancy but turn to a vibrant red in autumn. Virginia creeper is often used as an ornamental plant to cover walls and fences.
Other notable members of the Oleaceae family: Horse chestnuts, maples and lychees.
Cranberry and blueberry
Despite their obvious differences in colour, taste, and texture, cranberries and blueberries are both members of the Ericaceae family, specifically within the Vaccinium genus. This family is characterised by flowering plants often found in acidic or infertile growing conditions. The Vaccinium genus itself is diverse, encompassing a wide variety of species that range from low-growing shrubs to small trees. Both cranberries and blueberries have evolved to produce antioxidant-rich, brightly coloured fruits known as epigynous or false berries.
Cranberries are evergreen shrubs native to North America that produce small, red fruits. The tart fruit is a staple in Thanksgiving and Christmas feasts and is used to make sauces, and juices. Cranberries also have a number of health benefits due to their high vitamin C content.
Blueberries are hardy shrubs native to North America that are grown for their small, sweet, and mildly tart berries. These berries are a rich source of antioxidants, Vitamin C, and dietary fibre.
Other notable members of the Ericaceae family: Rhododendrons, heather and pieris.
Strawberry and avocado
Strawberries (Fragaria × ananassa) and avocados Persea americana) are part of the Rosaceae family, often referred to as the rose family. This family comprises a wide variety of plants including herbs, shrubs, and trees. Both the strawberry and the avocado are angiosperms (flowering plants).
Avocado is an evergreen tree native to central Mexico known for its nutrient-dense green berries. Avocadoes contain high levels of monounsaturated fats which can lower cholesterol. Culinary uses for avocado include raw, salads and guacamole.
Strawberries are a perennial plant native to Northern Europe. Strawberries are eaten raw in fruit salads, on their own or used for marmalade.
Other notable members of the Rosaceae family: Rose, apple, cherries, geum.
Coffee and gardenia
Coffee (Coffea species) and gardenia (Gardenia species) both belong to the Rubiaceae family, also known as the coffee, madder, or bedstraw family. This large plant family contains over 13,000 species and is characterised by simple, opposite leaves and interpetiolar stipules.
Coffee is a flowering plant native to tropical Africa popular for its seeds or “beans”. Coffee beans contain caffeine, which is a central nervous stimulant. Its purpose is to protect the beans from herbivory and is now one of the most popular beverages on the planet.
Gardenia is a genus of flowering plants within the Rubiaceae family, grown for their fragrant, showy white flowers and attractive green foliage.
Other notable members of the Rubiaceae family: Ixora and rubia.
How is it possible related plants can be native to different parts of the world?
It’s hard to imagine how the Australian flannel flower can be related to the carrot or the mango to Virginia creeper, but there are a number of ways plants have evolved from a common ancestor into the species we now know.
Plate Tectonics: Millions of years ago, the landmass on Earth was a single supercontinent known as Pangaea. Over time, tectonic forces caused Pangaea to split apart into separate continents and move to their current locations. Plants living on Pangaea became separated and evolved independently, to form new species in response to their unique environments.
Seed Dispersal: Seeds can be carried great distances by wind, water, and animals. Fruits eaten by birds can have their seeds distributed through the bird’s droppings. Some seeds can float on water, spreading plants to new areas via rivers and ocean currents. Some plants have evolved seeds that can withstand the digestive tracts of animals, facilitating their spread over large areas.
Human Intervention: Humans have been instrumental in spreading plants across the globe. As our ancestors migrated, they brought with them plants and seeds. Trade and colonisation also played a significant role in distributing plant species far from their original habitats, especially in modern times.
Evolution and Adaptation: Over long periods, plants can evolve to adapt to different climates, soils, and ecosystems, leading to the development of new species. This is often driven by natural selection, where certain traits become more common in a population because they provide a survival advantage in a particular environment.
These processes explain why related plants can be found in widely separated regions today. For instance, similar conditions in different parts of the world can lead to parallel evolution, where unrelated plants may evolve similar traits, making them look deceptively related. In contrast, closely related plants may look quite different if they have adapted to disparate environments.
Julia is a writer and landscape consultant from Wollongong with a love of horticulture. She had been an avid gardener for over 30 years, collects rare variegated plants and is a home orchardist. Julia is passionate about learning and sharing her knowledge of plant propagation and plant toxicology. Whether it’s giving advice on landscape projects or sharing tips on growing, Julia enjoys helping people make their gardens flourish.

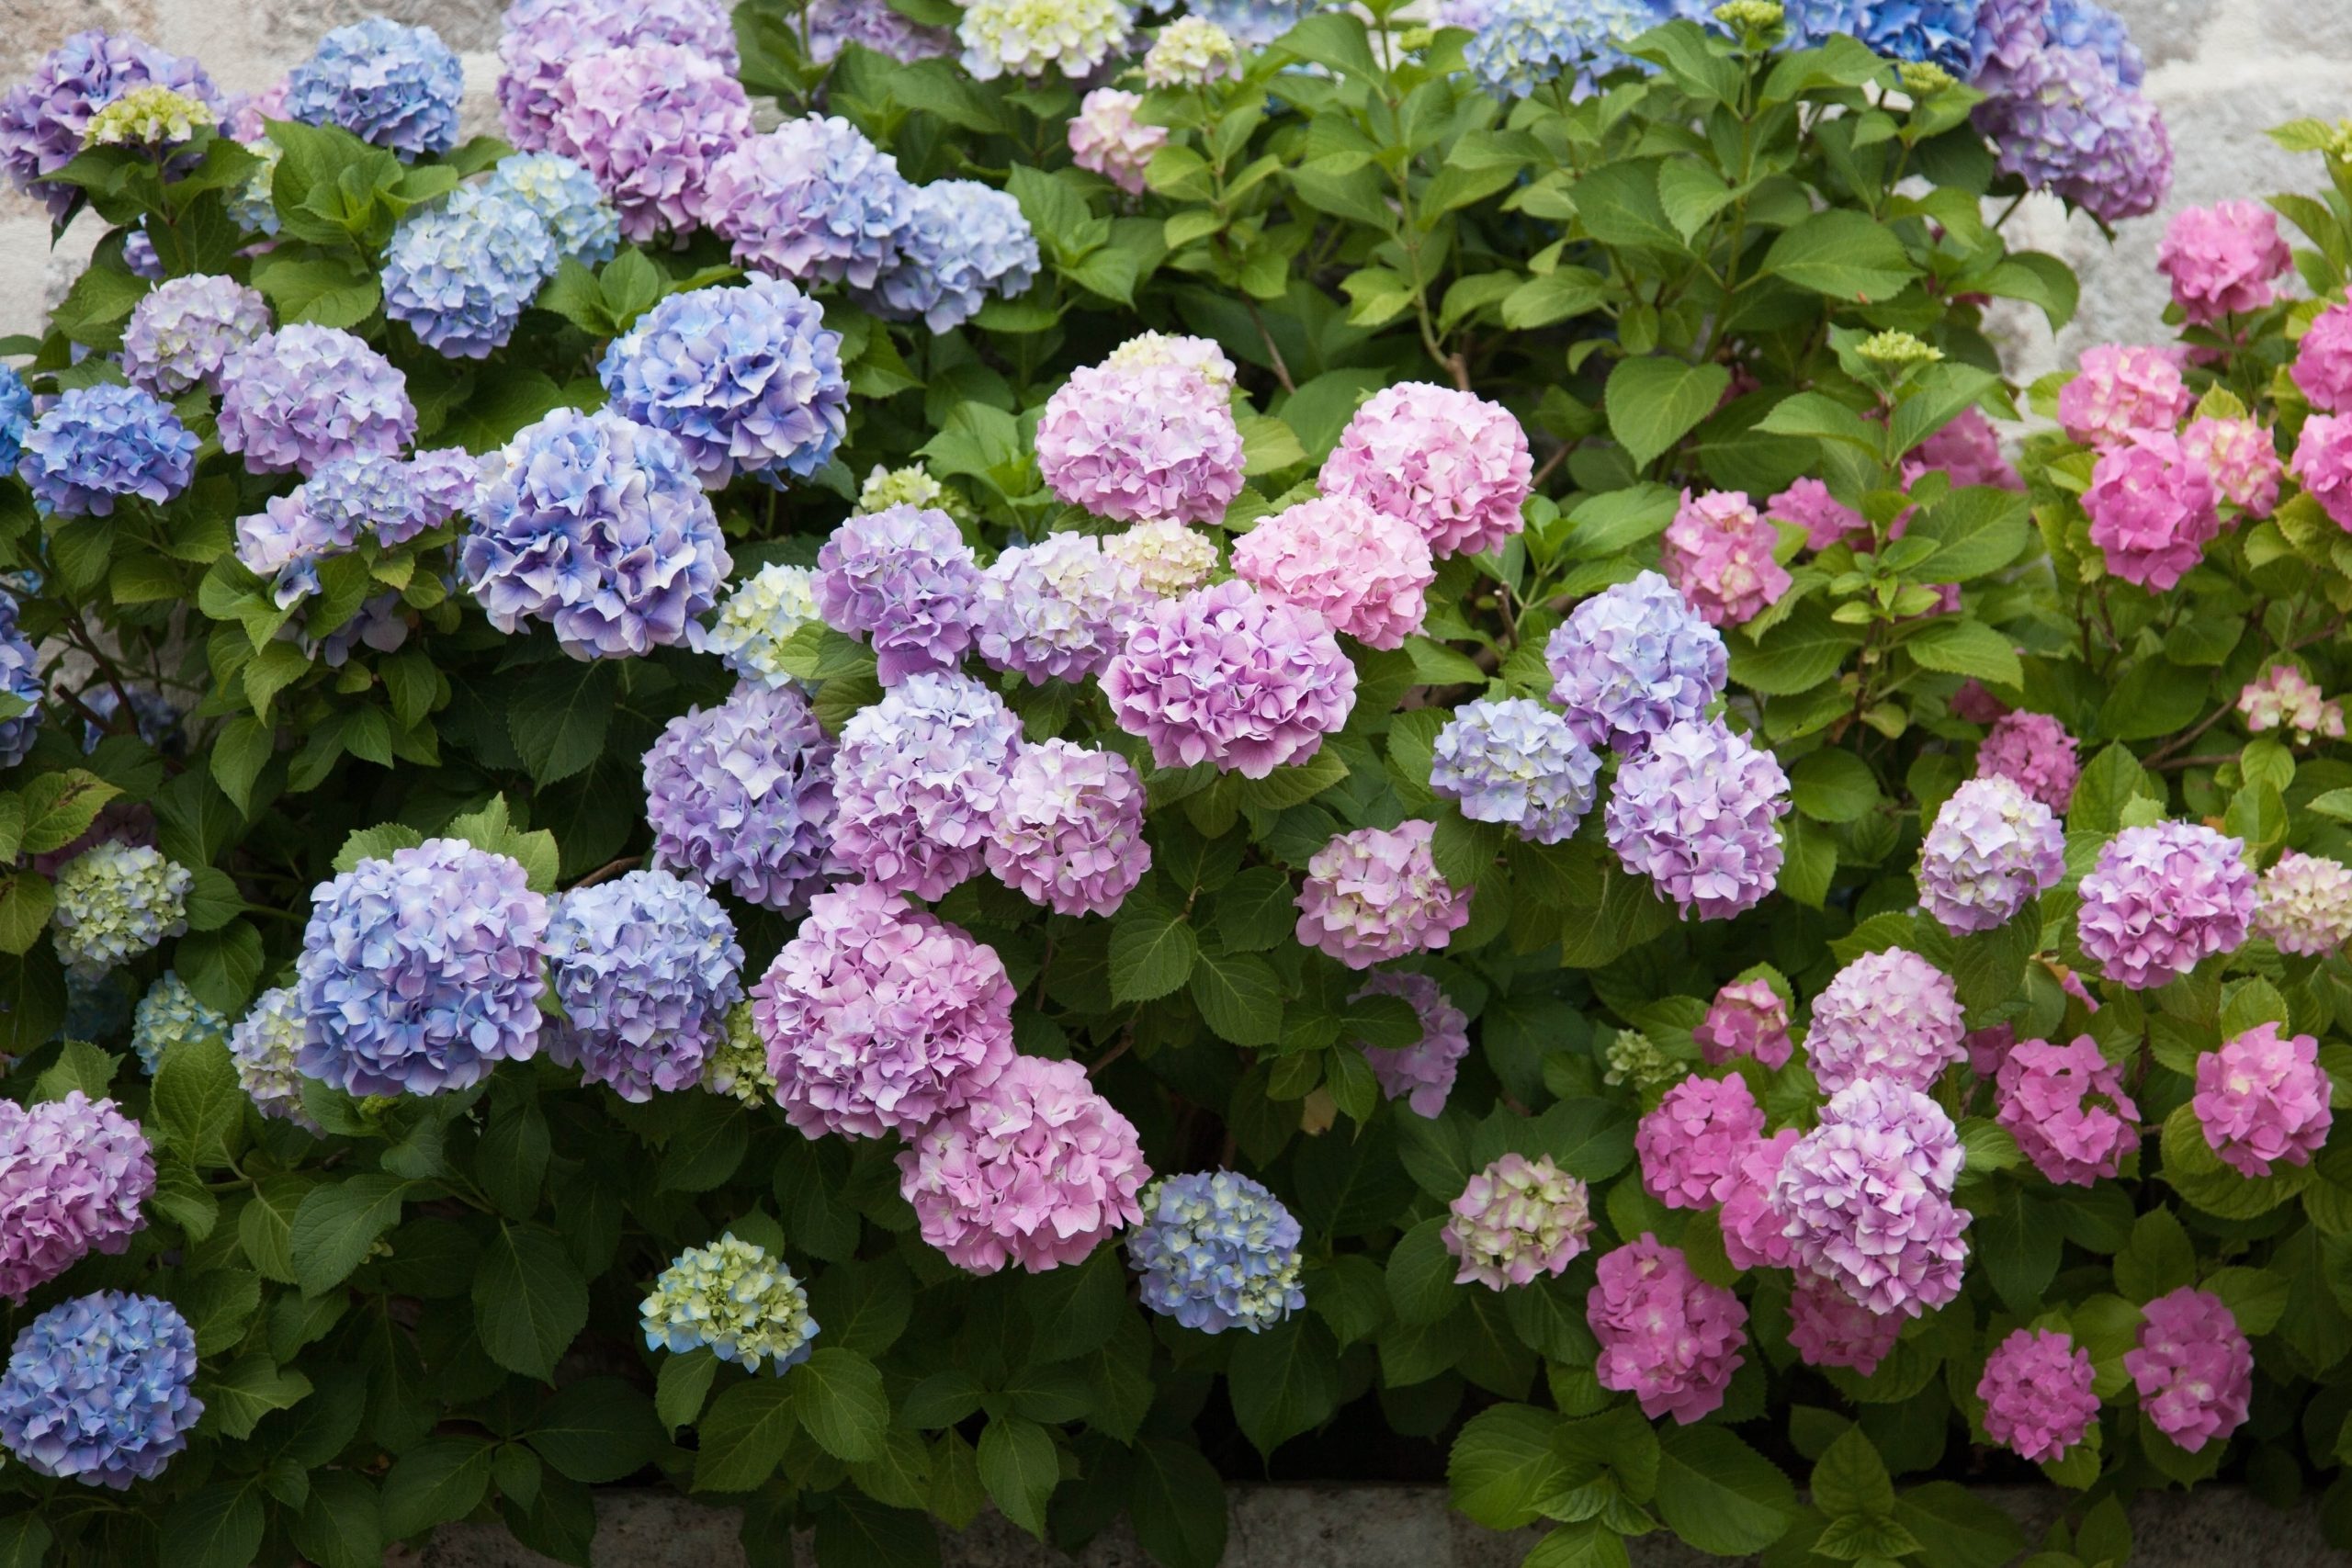
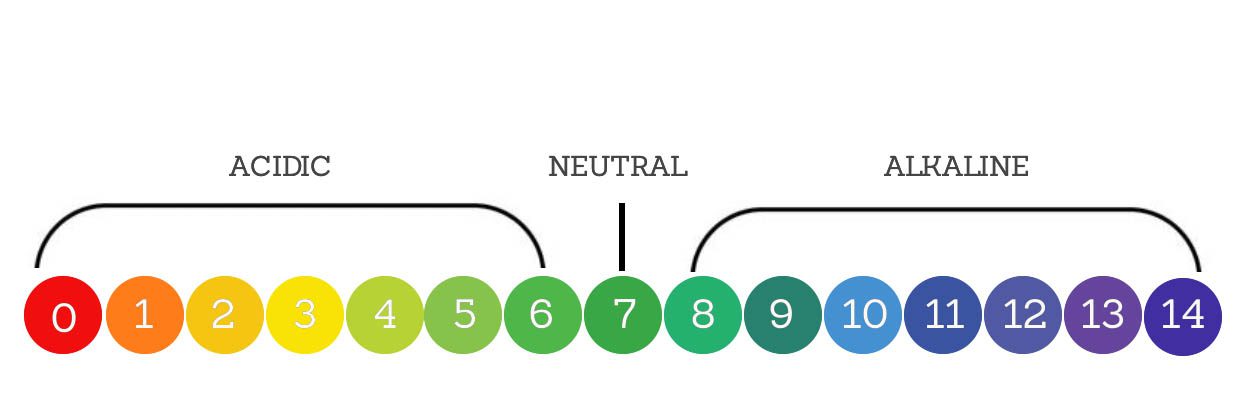 The term “pH” stands for “potential of hydrogen” or “power of hydrogen.”It measures the concentration of hydrogen ions (H⁺) in a solution. The pH scale is logarithmic, which means that each whole pH value below 7 is ten times more acidic than the next higher value. For example, a pH of 4 is ten times more acidic than a pH of 5 and 100 times more acidic than a pH of 6. Similarly, each pH value above 7 is ten times more alkaline than the next lower value.